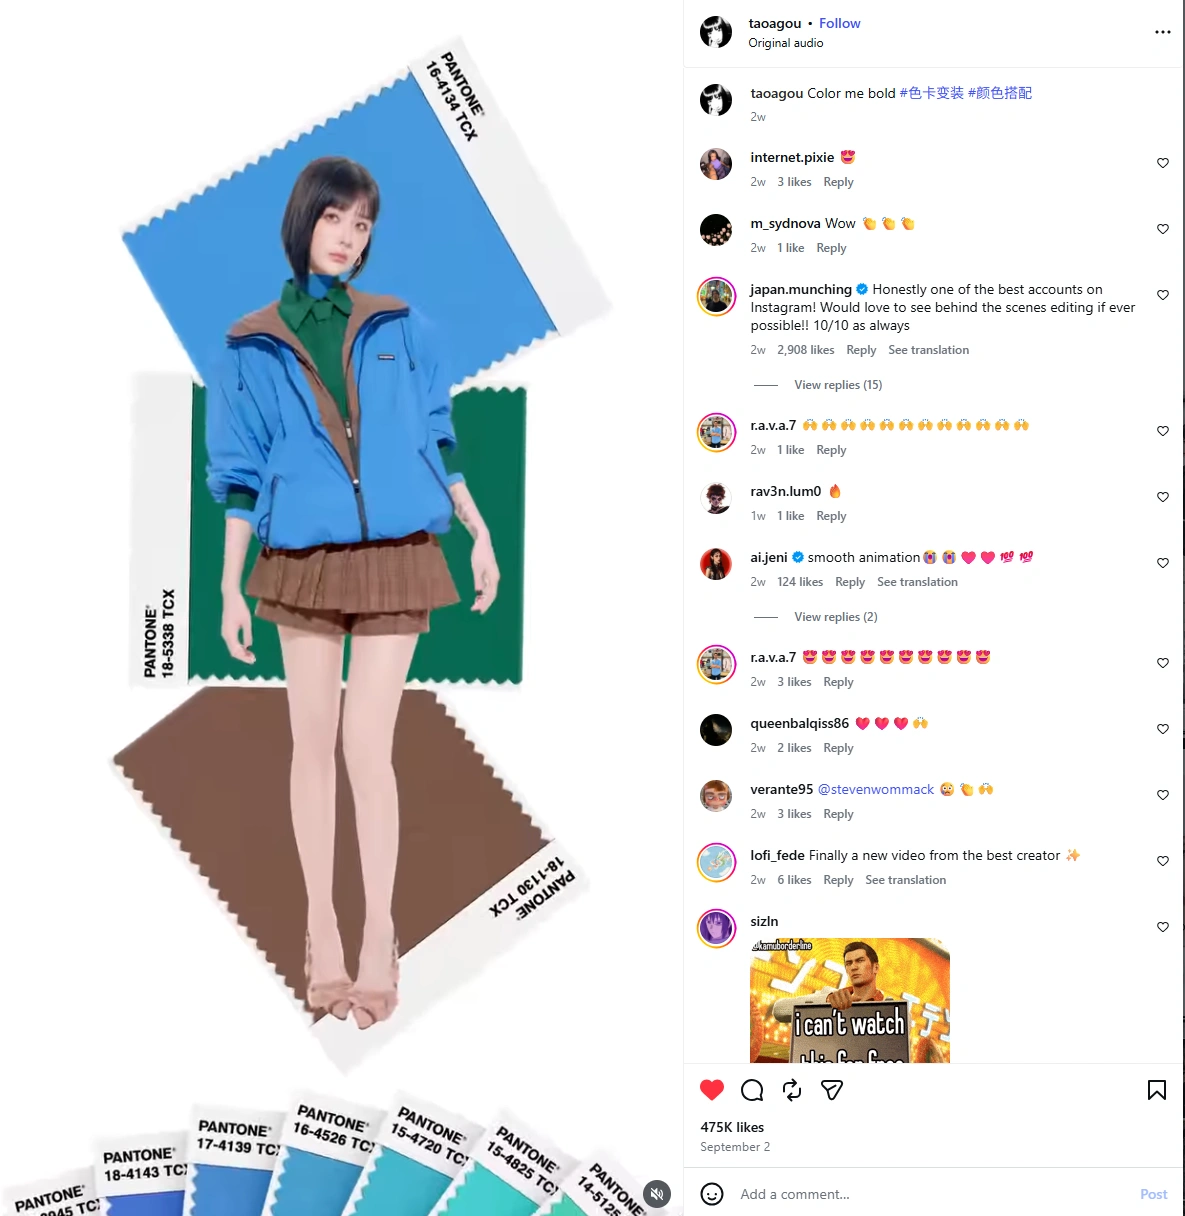
I recently saw a Color Palette Outfit Transition video getting a lot of attention on social media.
The concept was pretty simple: a few color swatches appeared behind the model, and every time the palette changed, her outfit changed with it.
I liked that the colors weren’t just there for decoration. They actually controlled the styling of each look.
So I got curious and tried recreating my own version with AI.
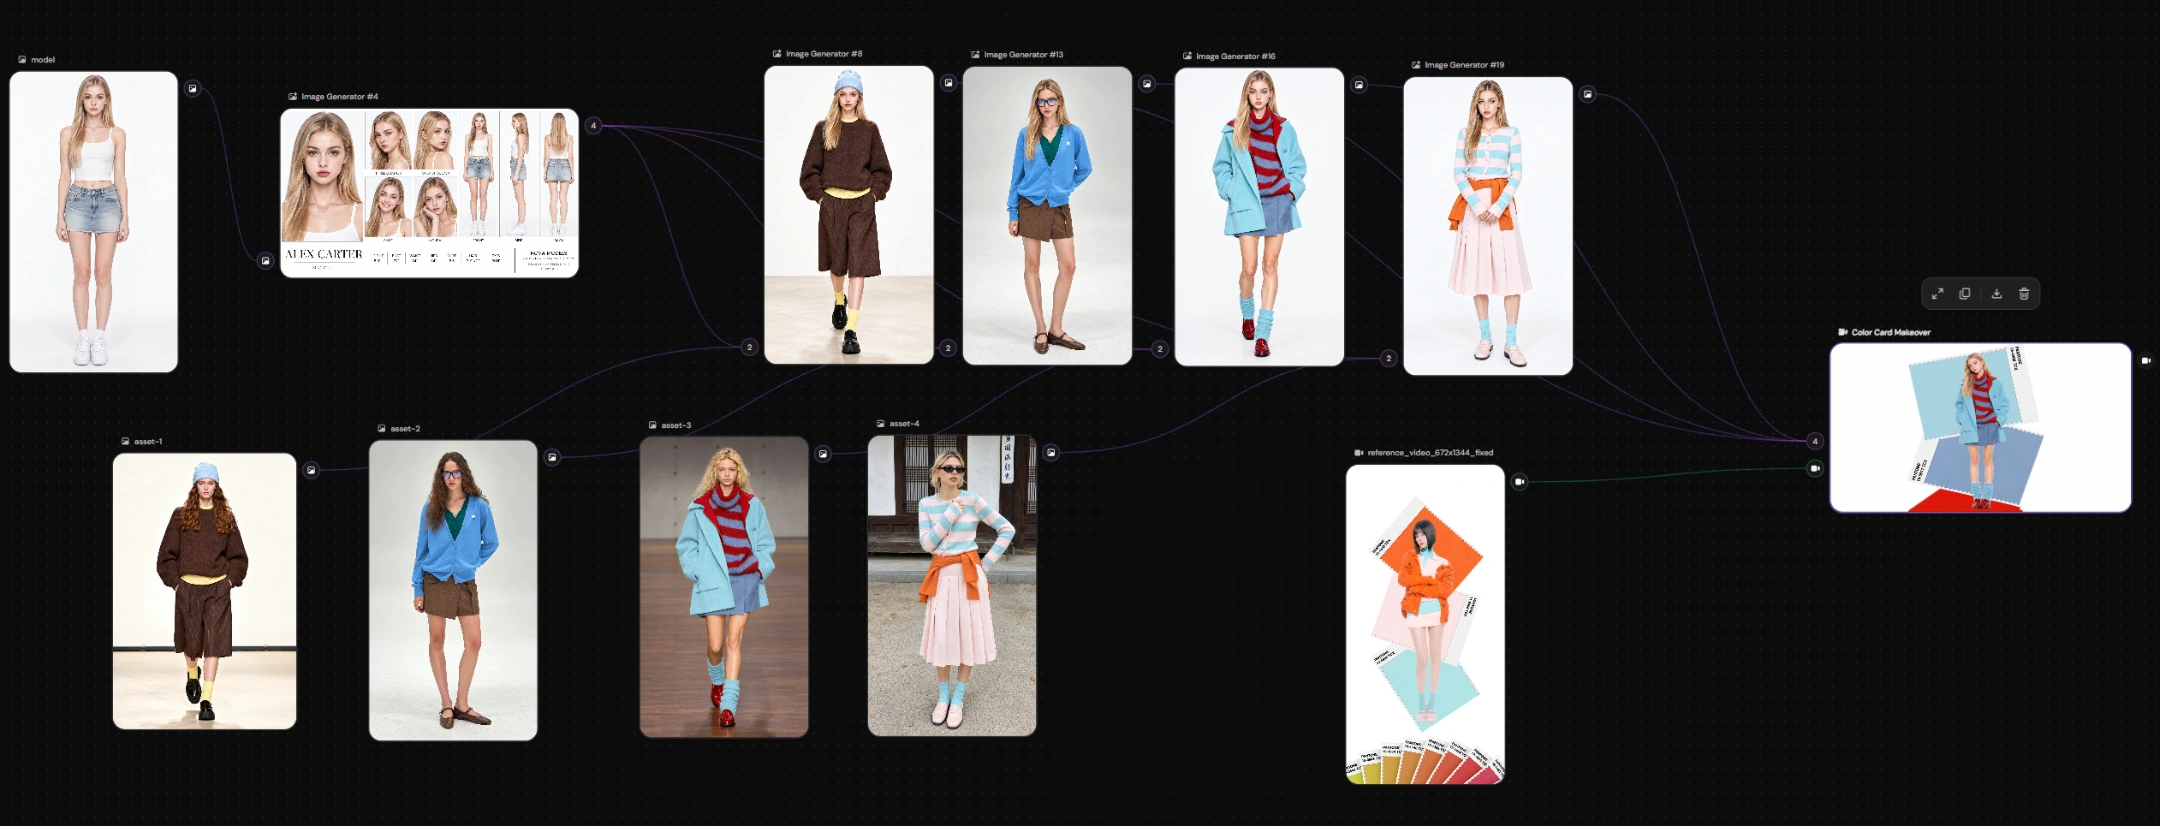
I used PicLumen AI Canvas to build the workflow, GPT or Gemini to read the colors from the reference frames, Image to Image for the outfit changes, and Seedance 2.5 for the final video.
This is the PicLumen AI Canvs workflow I ended up using:
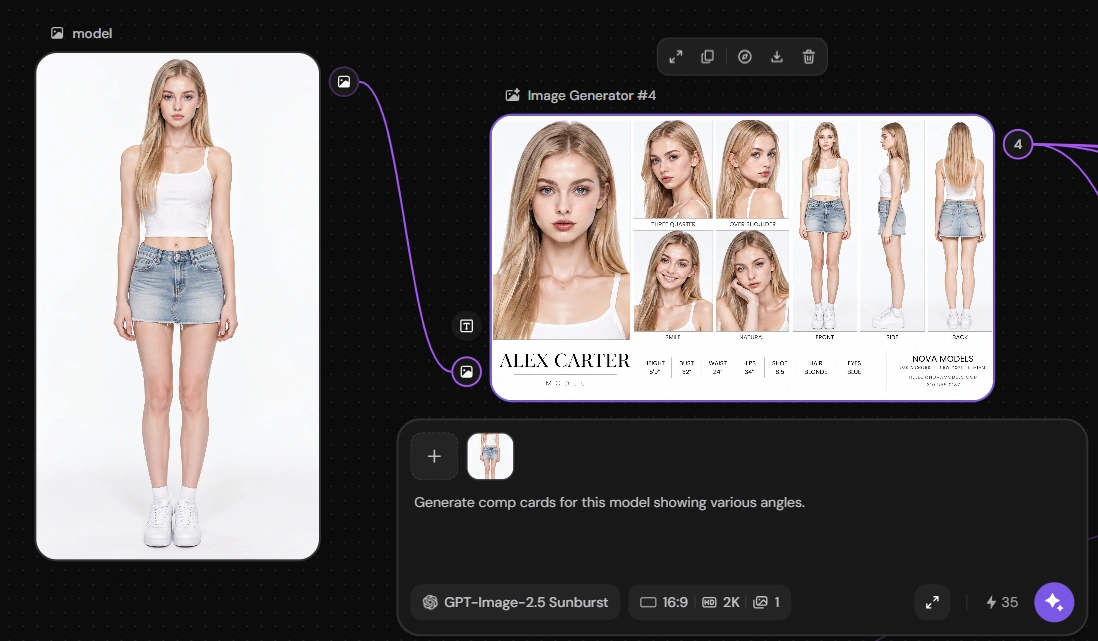
Step 1: Generate One Base AI Model
I started by generating one base model image.
At this stage, I wasn’t trying to make a complicated fashion image. I just needed a model with a face and body type I liked, because I wanted to keep the same person across all four outfits.
I used a clean full-body image as the starting point, then inside Canvas I generated a few extra angle references for the same model.
That gave me a more stable set of images to use later, especially when the final video needed front view, side view, and turning motion.
So the first part of the workflow was basically:
one model image → Character design sheet
That helped a lot with consistency later.
Step 2: Pick Four Outfit References
Next I chose four outfit references. The color matching came after.
I treated these as the base outfit structures for the four looks in the final Color Palette Outfit Transition.
Step 3: Extract the Color Codes from the Four Keyframes
Then I took four keyframes from the reference video, one for each outfit section.
Each keyframe had its own swatch palette, so I uploaded both the outfit reference image and the color swatch keyframe to GPT or Gemini and asked it to read the palette and output the matching HEX color codes.
That part was easy.
A simple request like this worked well:
Analyze the color swatches in this keyframe and give me the main HEX color codes that should be applied to the outfit.
This gave me clear color values I could actually use instead of vague color descriptions.
For example:
#C0D9F1
#F8DB70
#573E3F
or
#B1DBE4
#8CA9C9
#D00C0B
That made the later edits much more controllable.
Step 4: Recolor Each Outfit to Match the Swatches
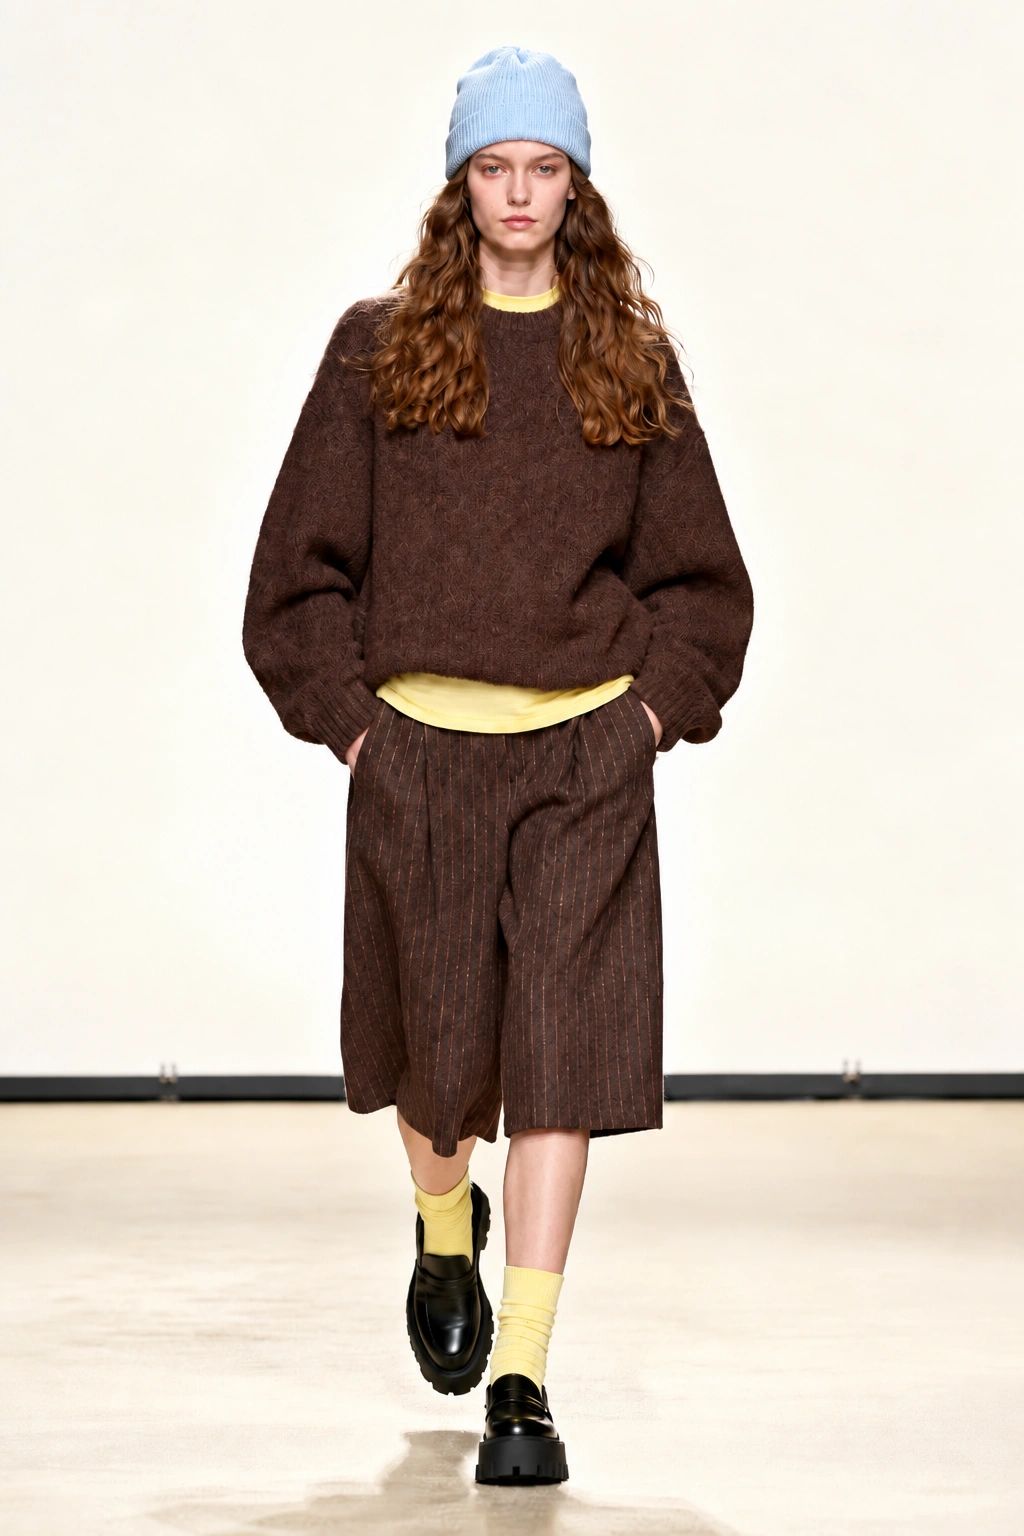
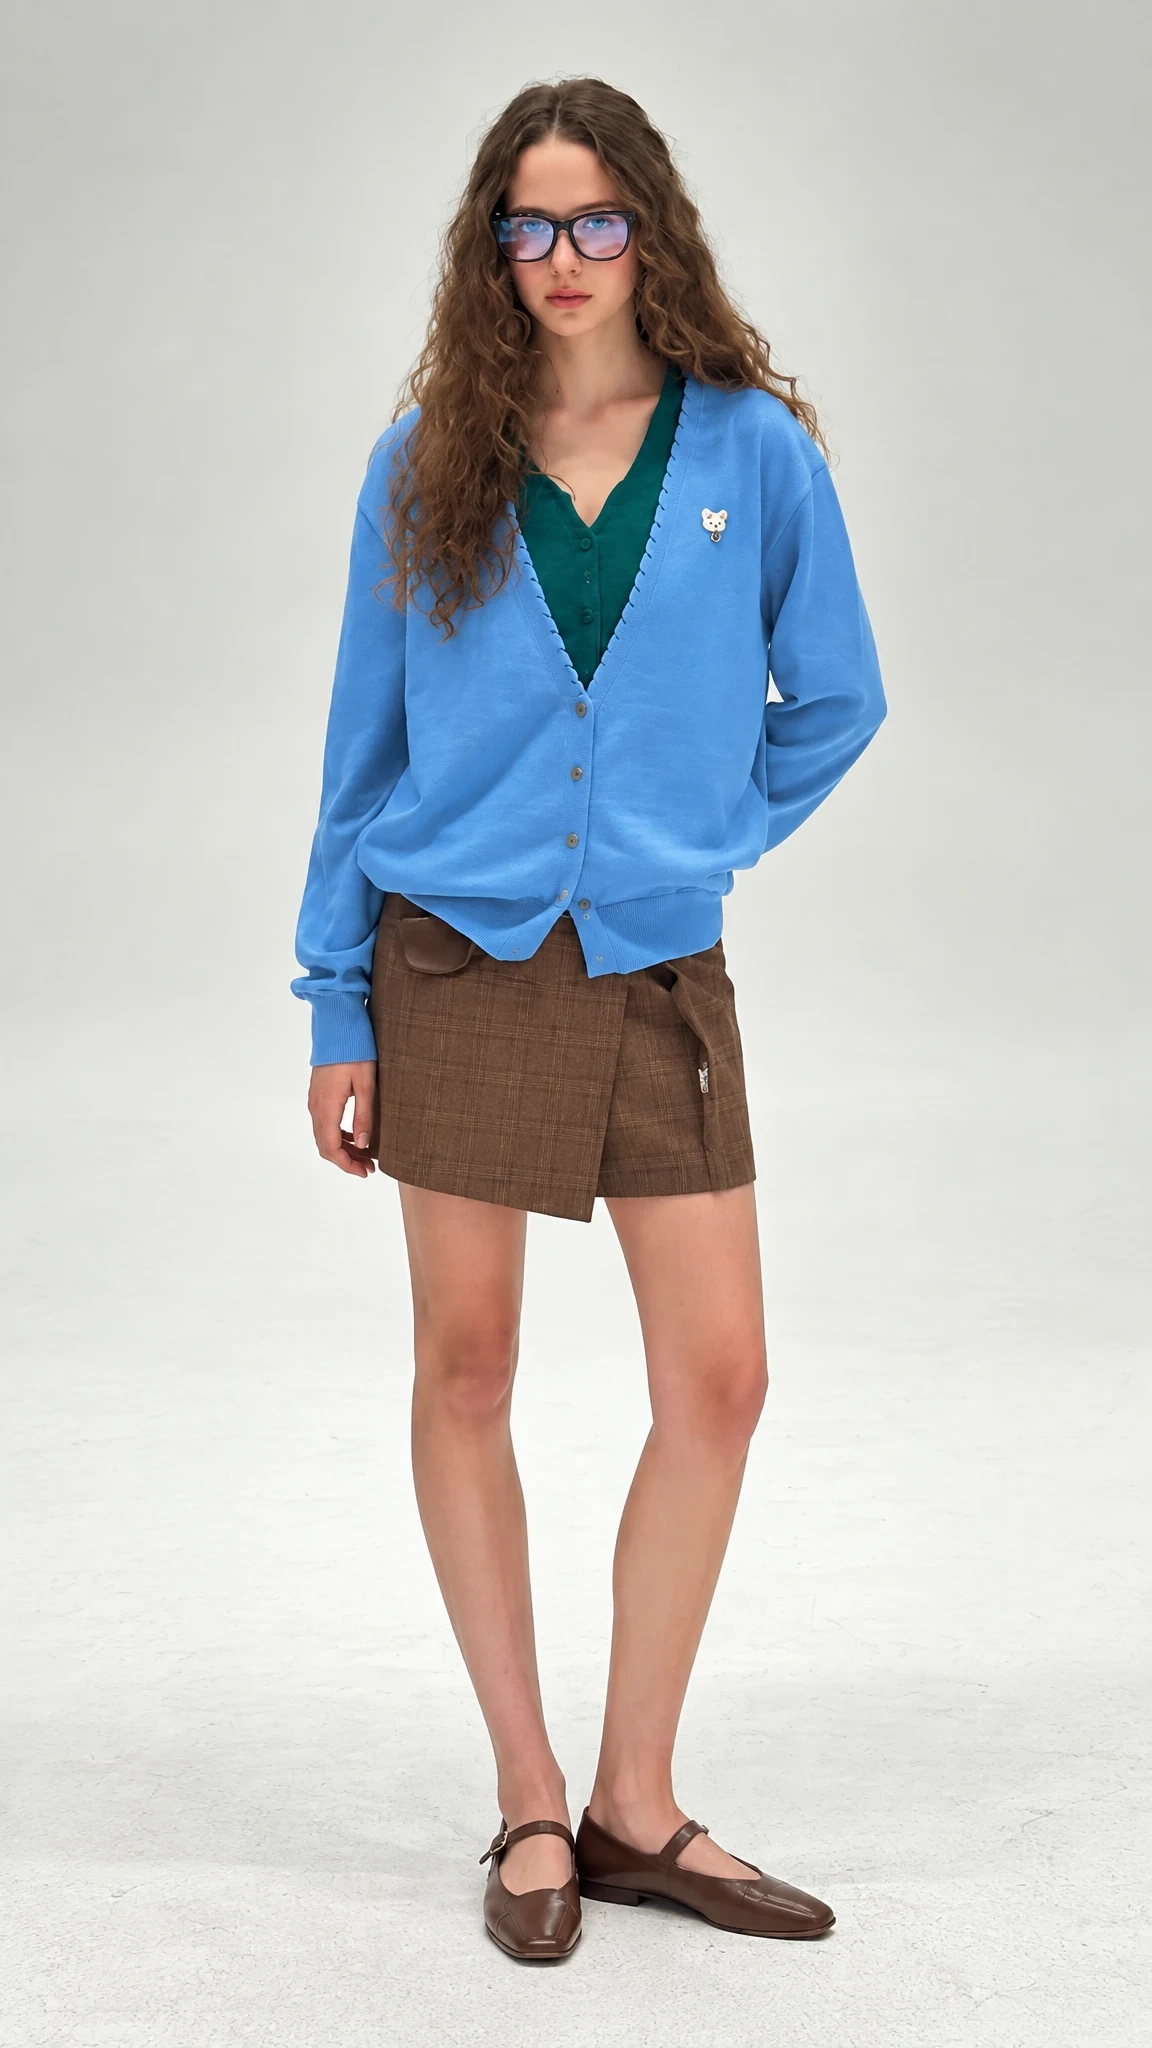
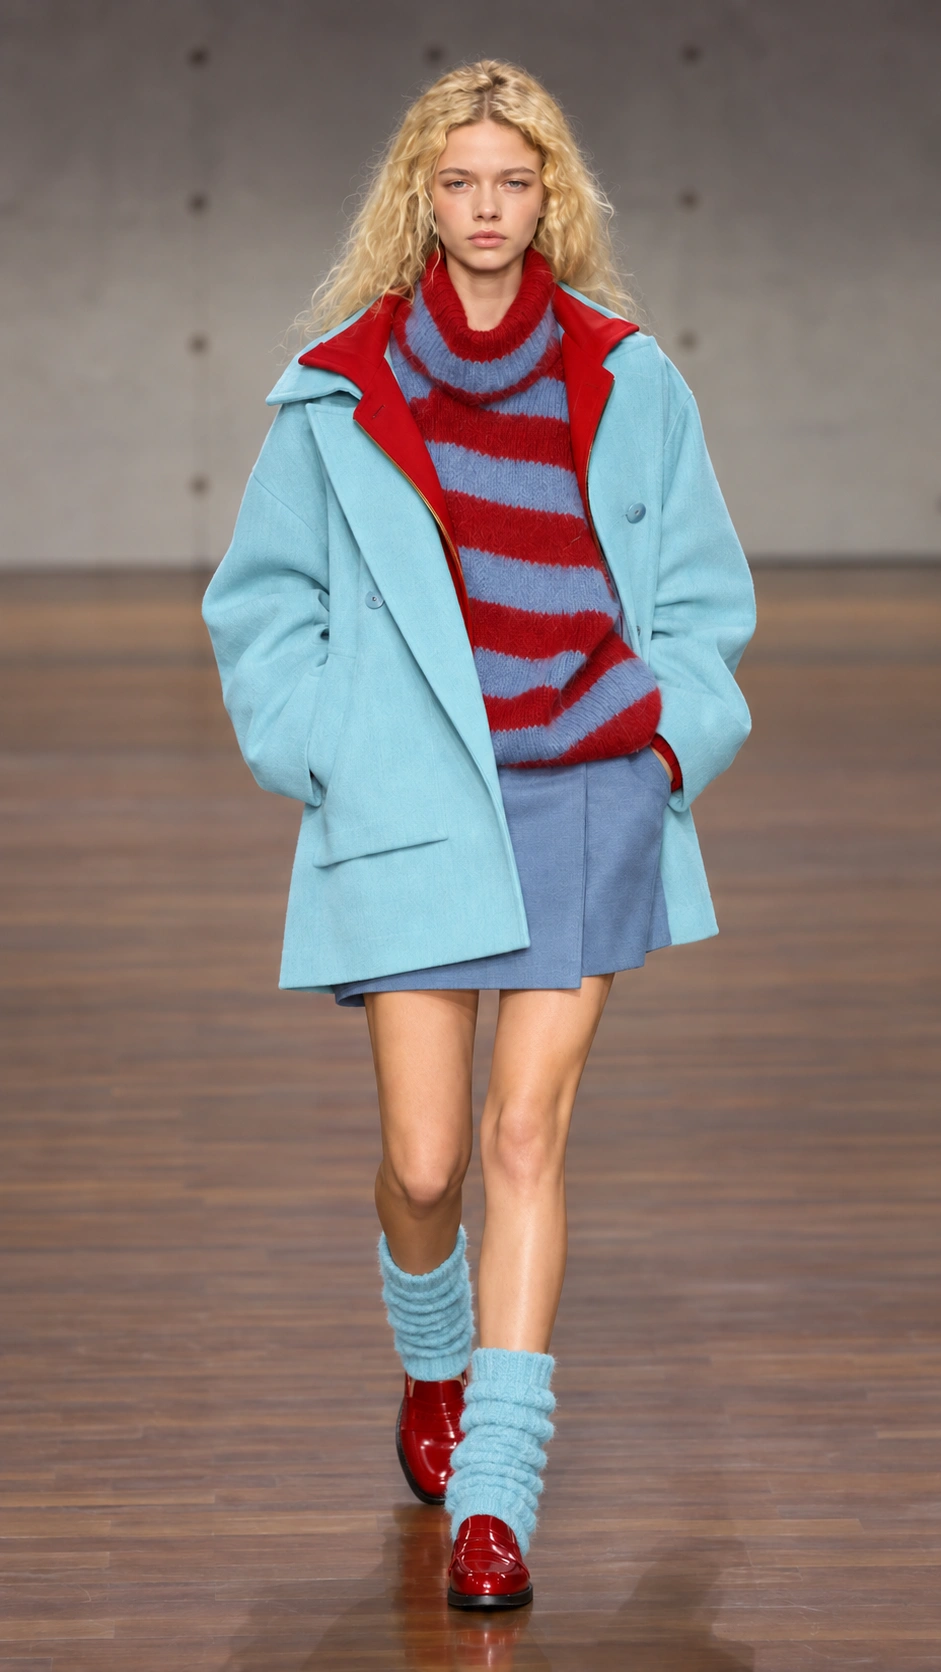
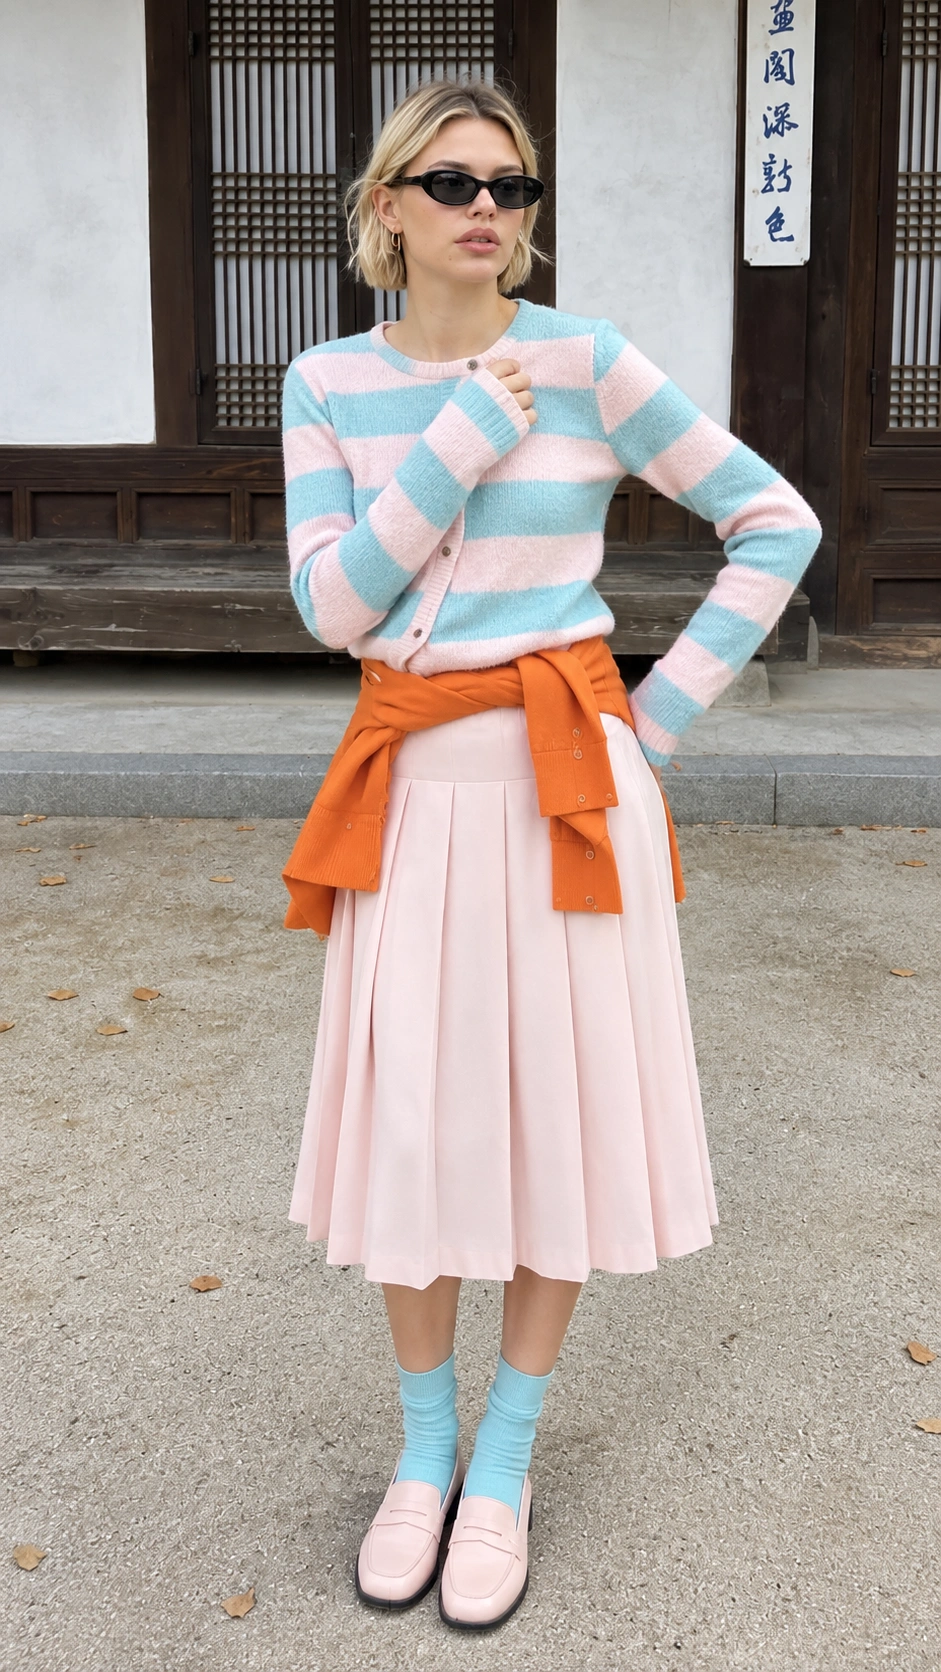
Once I had the color codes, I used Text to Image in Canvas to adjust each outfit reference so the clothing colors matched the swatches from the corresponding keyframe.
This part was mostly about replacing the original outfit colors while keeping the outfit structure the same.
So if the palette said:
light blue
yellow
dark brown
I would assign those to specific clothing parts like hat, top, inner layer, skirt, socks, or shoes.
I repeated that for all four outfits until I had four clothing reference images whose colors matched the four color palettes from the video.
At this point I had:
four outfit references
four matching color palettes
four recolored outfit images
 |  |  |  |
Step 5: Combine the Model Angle References with the Recolored Outfits
After that, I went back into PicLumen AI Canvas and connected the model angle references with the recolored outfit references.
This was where I generated the final dressed model images.
I matched them one by one, so each outfit had its own model result. The goal here was simple:
keep the same model identity
keep the outfit structure
keep the new swatch-based colors
By the end of this step, I had four final model images, each one wearing one of the four palette-matched outfits.
That was the image set I needed for the video stage.
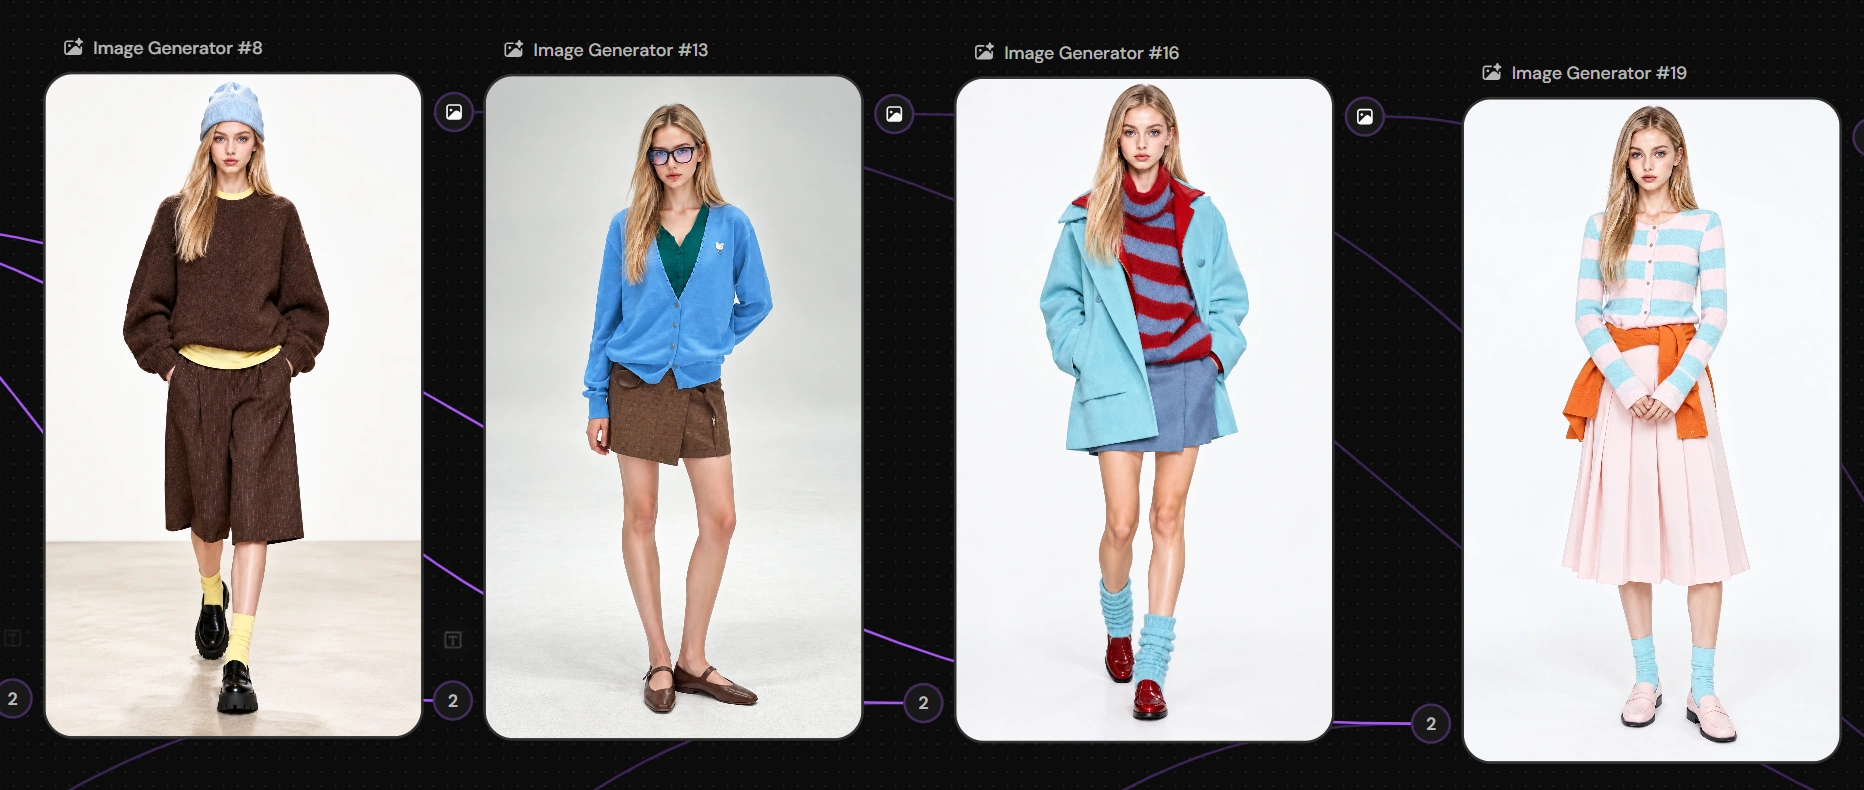
Step 6: Connect the Four Final Model Images and the Reference Video
Once the four styled model images were ready, I connected all four of them to the video generation node in Canvas.
Then I added the reference video.
For me, the logic was:
the reference video controls the motion, timing, camera, and background
the four model images control the identity, clothing, and outfit switching
This was the cleanest way to separate motion from appearance.
My Canvas workflow looked like this:
base model → angle references → outfit references → recolored outfits → dressed model images → reference video + Seedance 2.5That setup made the whole thing much easier to manage.
Step 7: Generate the Final Video with Seedance 2.5
For the final step, I used Seedance 2.5.
I connected:
the reference video
the four final model images
Then I chose:
12s
9:16
or another size if needed
After that, I pasted in the prompt and generated the final result.
That was it.
Once the four images were ready, the video stage was actually pretty fast.
The Prompt I Used
Below is the English version of the prompt, rewritten in a shorter and more natural way.
Video Prompt
Recreate the person in the reference video using the supplied target outfit images. Keep the original background, camera angle, framing, timing, lighting, and motion sequence from the reference video.
The original person should only be used as an invisible motion guide. Do not keep any part of the original face, hair, body, clothing, or shoes in the final result. From frame 0, the person on screen must already be Target Outfit Character 1.
Use the reference video only for pose, body movement, turning direction, timing, expression rhythm, and scene layout. Use the target outfit images only for identity, face, hairstyle, body proportions, outfit, shoes, and accessories. Ignore the static pose in the outfit images.
Transfer the original motion directly to the target character frame by frame. Match body direction, head angle, shoulders, arms, hands, pelvis, legs, feet, turning speed, pauses, and movement timing. Do not mirror left and right limbs.
During 0.00–2.24s, show Target Outfit Character 1 in black and white only, while the background stays fully in color. At 2.24s, the same character transitions from black and white to color.
Then switch by section to Target Outfit Character 2, Target Outfit Character 3, and Target Outfit Character 4, following the same timing as the reference video.
Keep the white background layout, color blocks, swatches, labels, and all original background animation unchanged. Do not regenerate or alter the background.
Re-render the new character naturally into the scene. Do not paste a cutout on top of the video. Avoid white outlines, glow, halos, gray edges, black edges, feathered borders, flicker, or transparency issues. Match the original video’s sharpness, grain, exposure, color temperature, compression, and motion blur.
Keep the result clean and stable. No subtitles, watermarks, logos, UI elements, or extra text.
Final Workflow Summary
So the full process was:
Generate a model image
Generate angle references of the same model in Canvas
Choose four outfit references
Take four keyframes from the reference video
Send the keyframes and outfit images to GPT or Gemini to get matching color codes
Recolor each outfit reference with text-to-image so it matches the swatch palette
Connect the model angle references with the recolored outfit references in Canvas
Generate four final dressed model images
Connect the four final images and the reference video to Seedance 2.5. Paste the prompt, and generate
That’s the whole workflow I used to recreate the Color Palette Outfit Transition.
I originally tried it because the trend looked fun. In the end, it turned into a pretty solid workflow for building fashion-style AI videos.