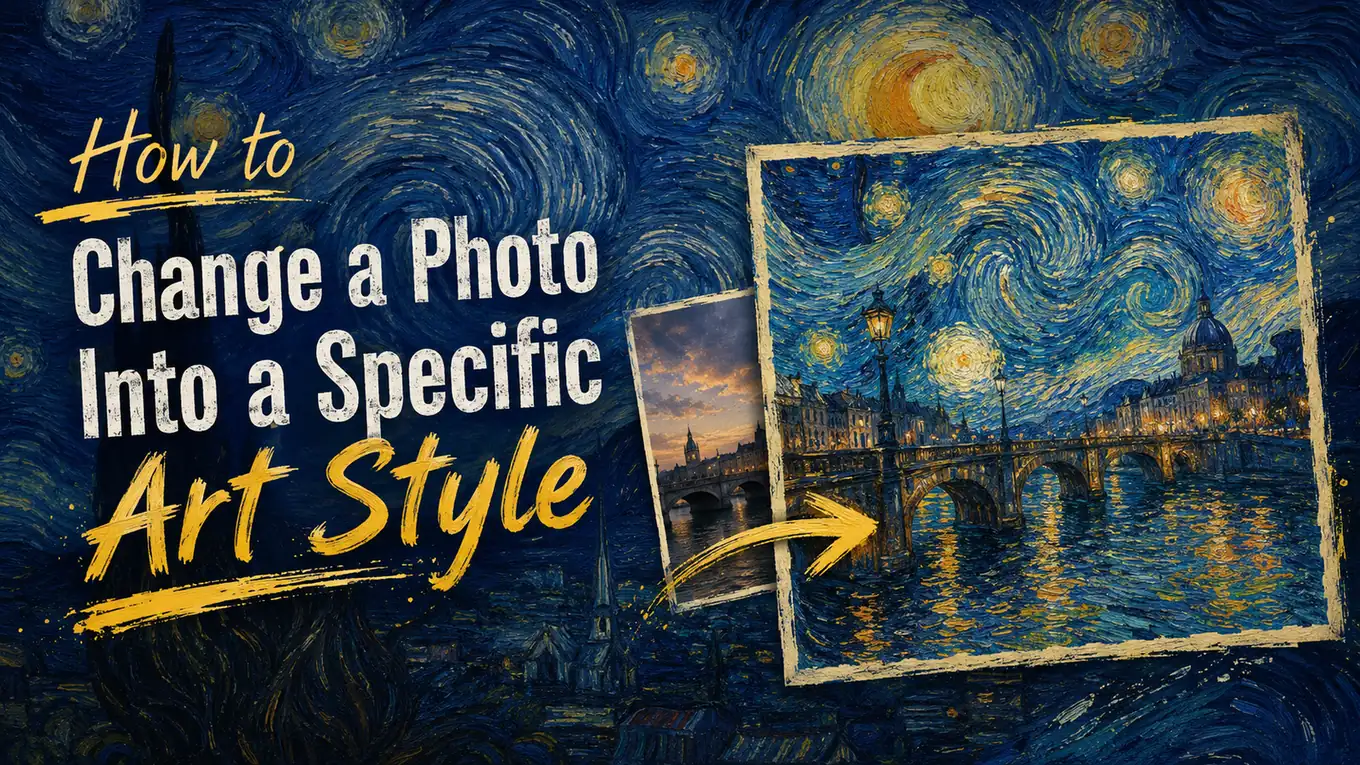
A good photo can still feel wrong for the project you are working on. The subject and composition may be usable, but the realistic camera look does not fit an illustrated poster, an anime profile image, or a painted social media visual.
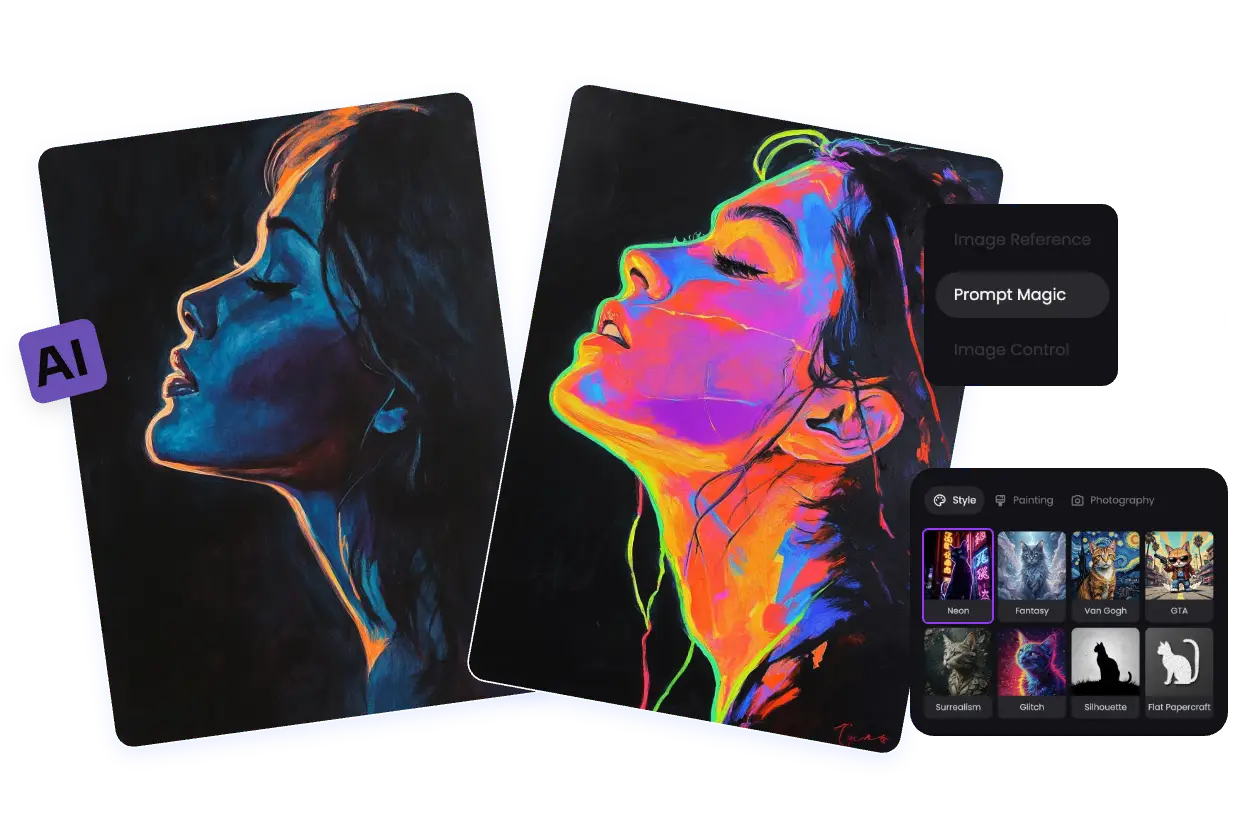
Photo filters offer a quick color change, though the result usually still looks like the original photograph. AI image style transfer goes further by redrawing the image with a different medium, texture, lighting style, and color treatment. A street photo can become a textured oil painting, while a portrait can take on the linework and shading of an anime frame.
PicLumen brings this process into its regular image generation workspace. You can choose a model, upload your source image, describe the look you have in mind, and continue editing the generated result when a smaller adjustment is needed.
This guide covers the full workflow, along with prompts for Van Gogh-inspired painting, watercolor, anime, pencil drawing, and commercial illustration.
What Is AI Image Style Transfer?
AI image style transfer uses an existing image as the visual base for a new generation. The source image provides information about the subject, pose, shapes, camera angle, and scene layout, while the prompt sets the artistic direction.
The result can look very different from the original without losing the scene completely. Common uses include:
Turning a portrait into painted or illustrated artwork
Converting a travel photo into a vintage poster
Giving a landscape a watercolor or oil-painted finish
Restyling a real person as an anime character
Creating an illustrated version of a product image
Applying one visual direction across a group of content assets
The amount of change depends on the image, the selected model, and the detail in the prompt. A broad instruction such as "make it artistic" leaves much of the result open to interpretation. Naming the medium, texture, colors, and lighting gives the model a clearer target.
How to Use AI Image Style Transfer on PicLumen
Step 1: Open PicLumen's Image Generation Workspace and Choose a Model
Open the image generation workspace on PicLumen and select the model you want to use.
PicLumen supports a range of popular models, including GPT Image 2.0, Seedream 5.0 Pro, Midjourney V8.1, Nano Banana 2, and Qwen Image. The available options let you explore several interpretations without moving your source image between separate platforms.
For a first attempt, choose the model that matches the visual direction you want. You can test another model later if the output is too realistic, too stylized, or simply different from what you pictured.
This comparison is often more useful than making large changes to the prompt straight away.
Step 2: Upload Your Image and Enter a Style Prompt
Upload the photo you want to restyle, then enter a prompt describing the target appearance.
Clear images usually give the model more reliable visual information. For a portrait, the face and hairstyle should be easy to see. Product photos benefit from readable labels, accurate packaging shapes, and clean lighting. A landscape image works better when the main structures and depth of the scene are visible.
The prompt controls how the source image is redrawn. Include the artistic medium and the visual details that define it, such as brushwork, surface texture, palette, and lighting.
A flexible prompt format is:
Restyle this image as a [specific art style] using [brushwork or linework], [surface texture], [color direction], and [lighting]. Keep [important image details] recognizable.
The final part should match the image rather than repeating the same general instruction every time. A portrait may need the face and expression to remain recognizable. A product image may depend on the packaging proportions and label position. In a landscape, the road, buildings, or camera perspective may matter more.
A detailed prompt does not need to be long. Four or five precise visual cues often work better than a paragraph filled with vague adjectives. The next section has ready-to-adapt prompts for several popular styles.
Step 3: Choose the Resolution and Aspect Ratio, Then Generate
Choose the output resolution and aspect ratio after the image and prompt are ready.
The aspect ratio should reflect the final placement:
Use | Suggested Ratio |
Square social post | 1:1 |
Portrait post | 4:5 |
Story or short-video cover | 9:16 |
Blog or landscape image | 16:9 |
Using a ratio close to the source image helps maintain the original framing. A wider or taller format gives the model extra space to fill, which may lead to an extended background, a different crop, or a repositioned subject.
Choose a higher resolution when the visual style relies on fine detail. Painted texture, pencil lines, packaging text, and intricate clothing usually benefit from a larger output.
Review the selected model, source image, prompt, resolution, and ratio. Once the settings are correct, click Generate.
Step 4: Download, Share, or Continue With Edit
A finished result can be downloaded in its original generated quality or shared directly from PicLumen.
Some outputs will be usable immediately. Others may have the right overall direction but contain a small issue: the face is slightly off, the background is too plain, a section has the wrong texture, or the style is weaker than expected.
Use Edit for these cases.
Keep the edit instruction focused on the problem you can see. For example:
Increase the visible oil-paint texture in the background and sky. Leave the person unchanged.
Or:
Correct the product label and keep the current illustration style, lighting, and composition.
When the image is mostly successful, a targeted edit is usually more predictable than replacing the full prompt.
 Transfer AI Image Style Now
Prompt Templates for Popular Styles
The formula above works for any style, but seeing it filled in for specific looks makes it easier to adapt. Here are several prompts ready to use as a starting point.
Van Gogh-Inspired Painting
Reimagine this image as an expressive post-impressionist oil painting with thick curved brushstrokes, textured paint, deep blue shadows, glowing yellow highlights, and a restless painted sky. Keep the main subject and scene layout recognizable.
Before | After |
|---|---|
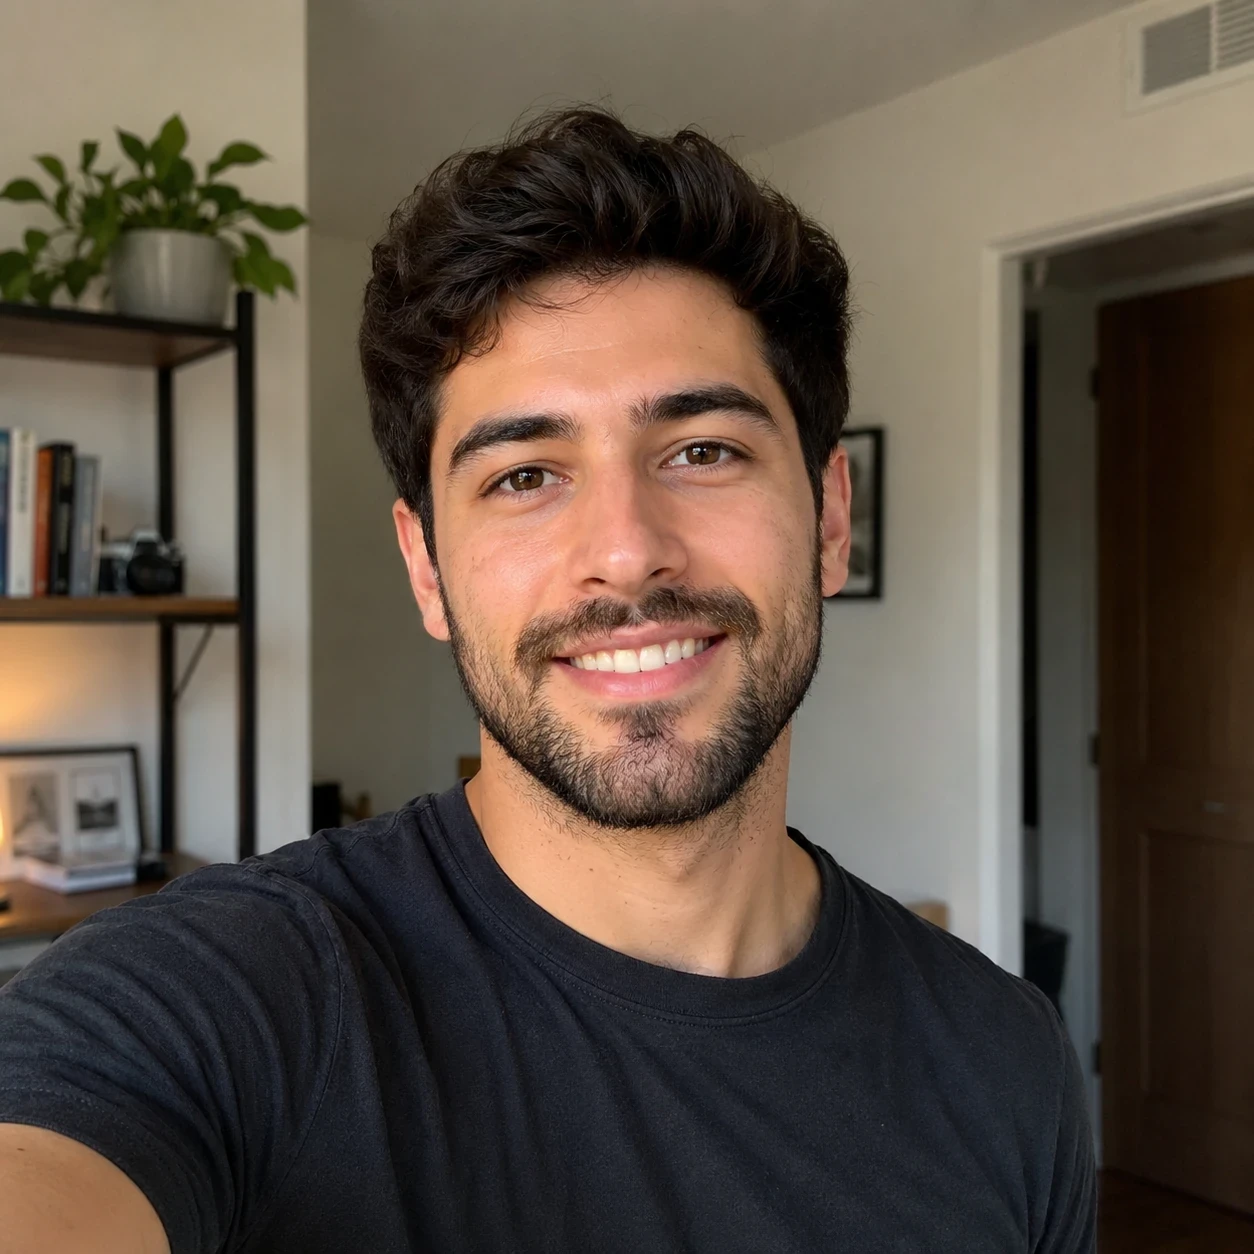 | 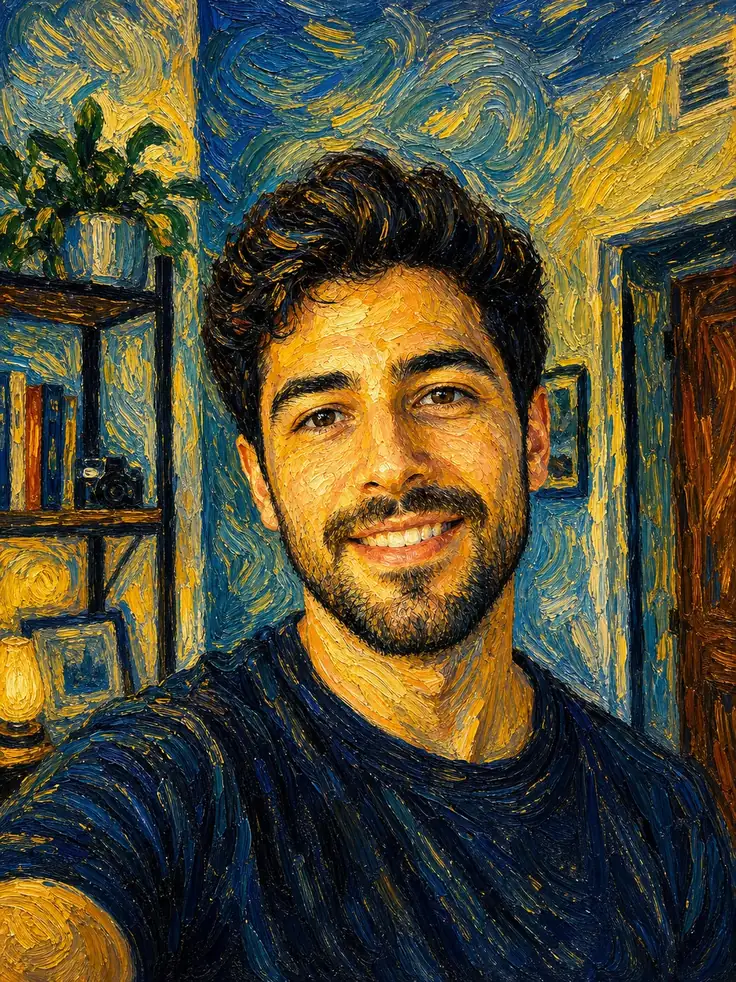 |
For a portrait:
Paint this portrait in an expressive post-impressionist style with visible oil brushwork, curved lines, deep blue and warm gold tones, and a textured canvas surface. Keep the face, hairstyle, expression, and clothing close to the source photo.
Before | After |
|---|---|
 | 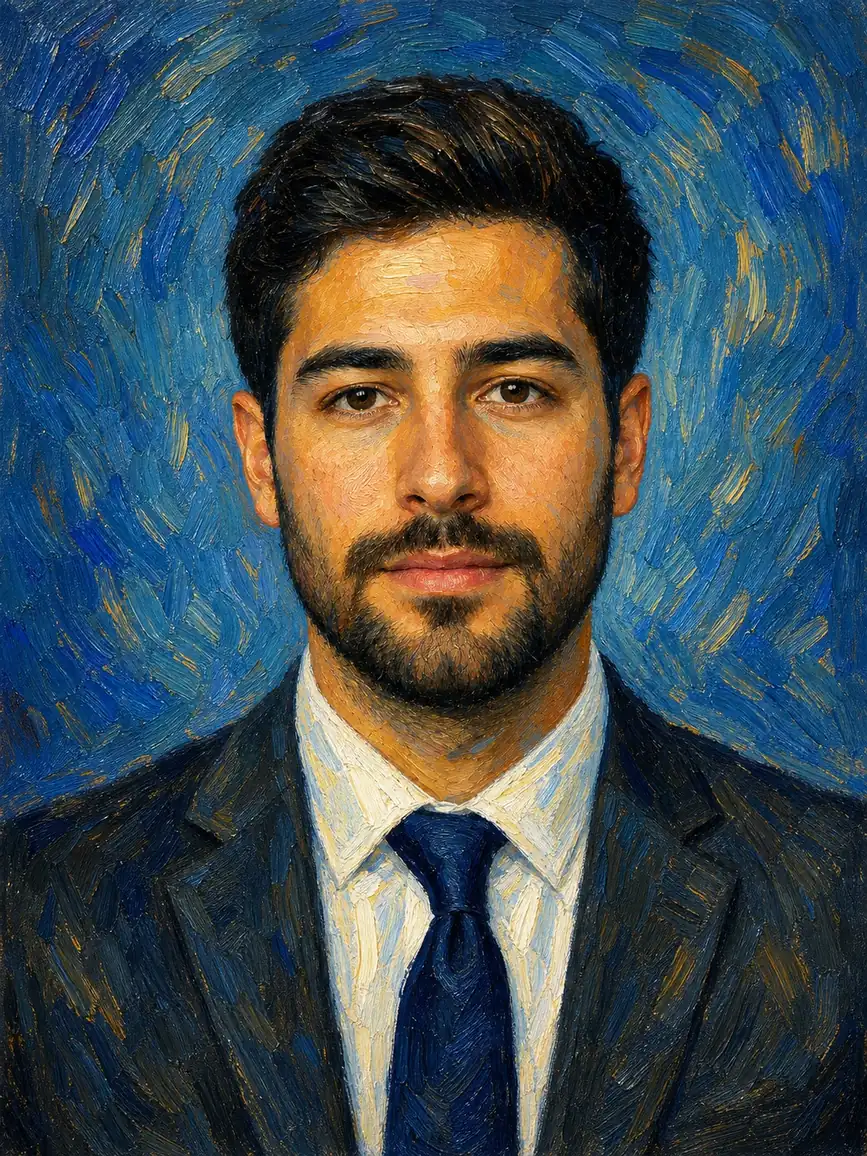 |
For a landscape:
Turn this landscape into a textured post-impressionist painting with rhythmic brushstrokes, swirling clouds, vivid blue and golden tones, and glowing evening light. Retain the road, trees, buildings, and original perspective.
Before | After |
|---|---|
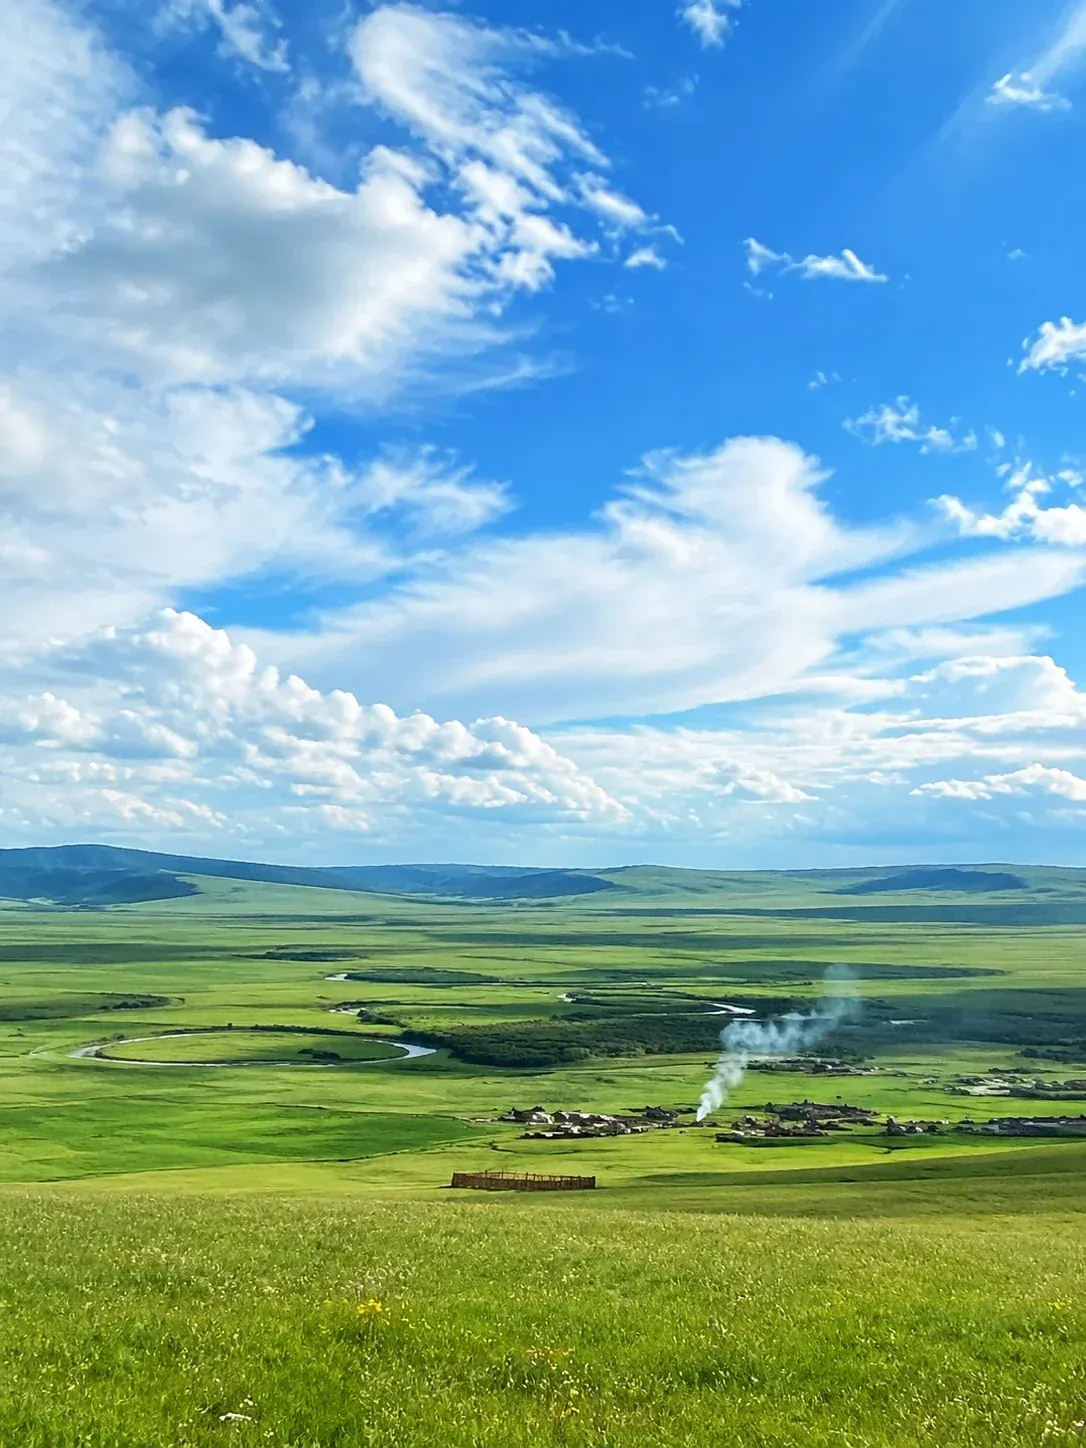 | 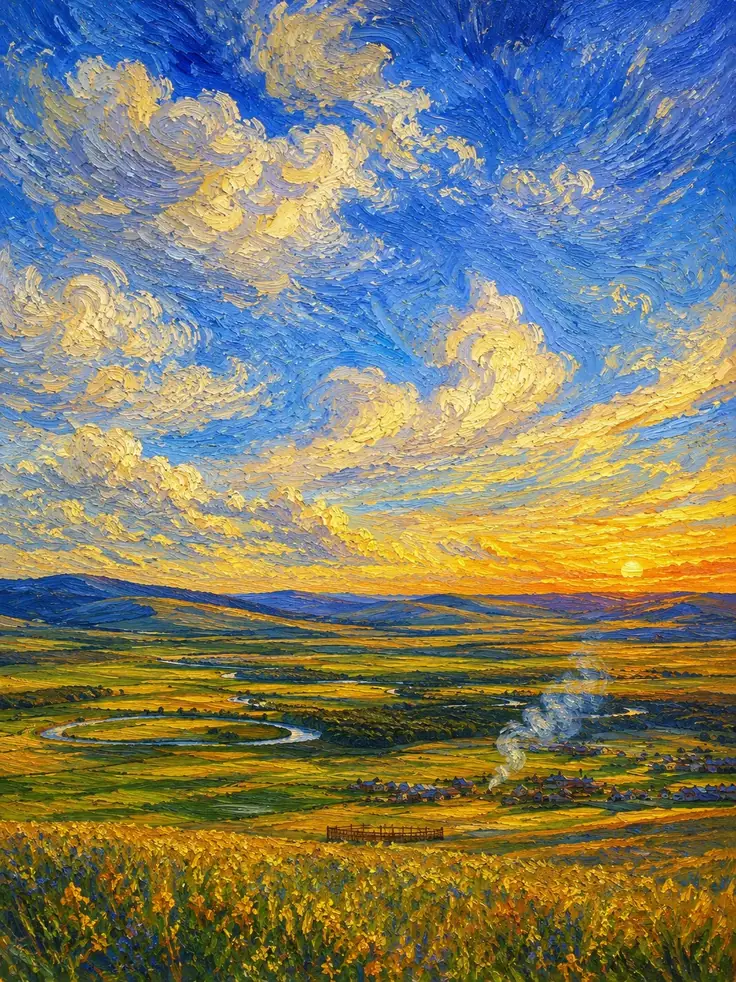 |
These prompts describe the features associated with the look instead of relying on the artist's name alone, which gives the model more to work with. If a first attempt only shifts the color palette without adding real texture, use Edit to ask for thicker surface paint and more visible brushwork — that usually works better than piling on more color adjectives.
Watercolor
Restyle this photo as a loose watercolor painting with translucent washes, soft edges, subtle paper grain, and gentle natural colors. Keep the subject and framing easy to recognize.
Before | After |
|---|---|
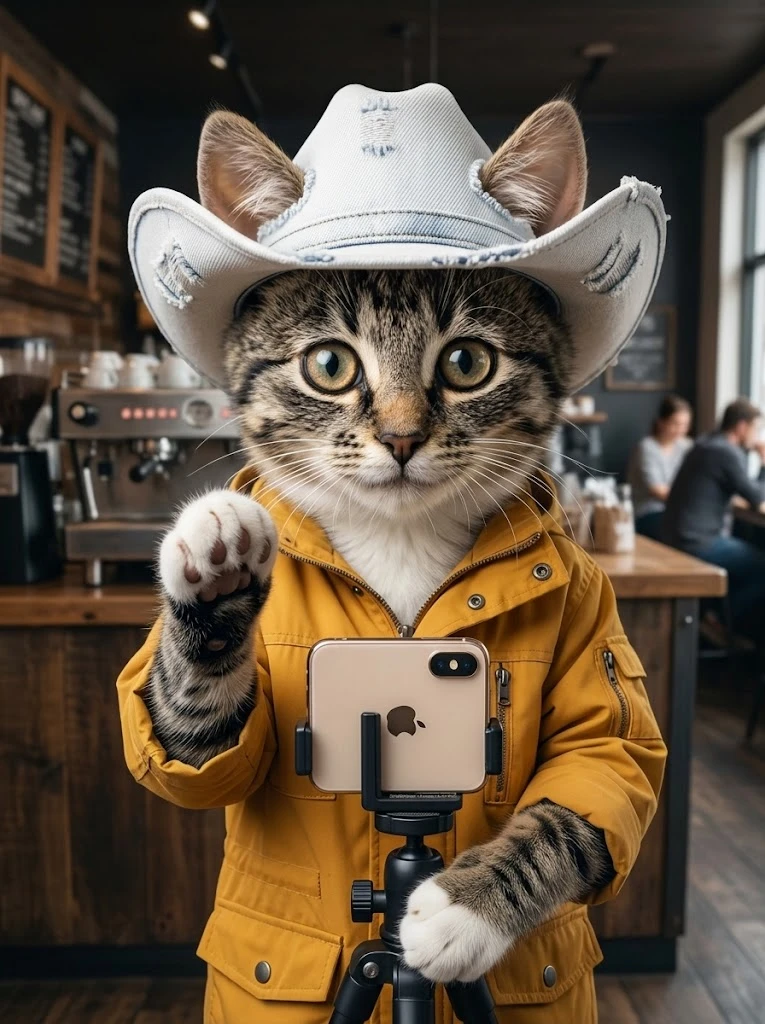 | 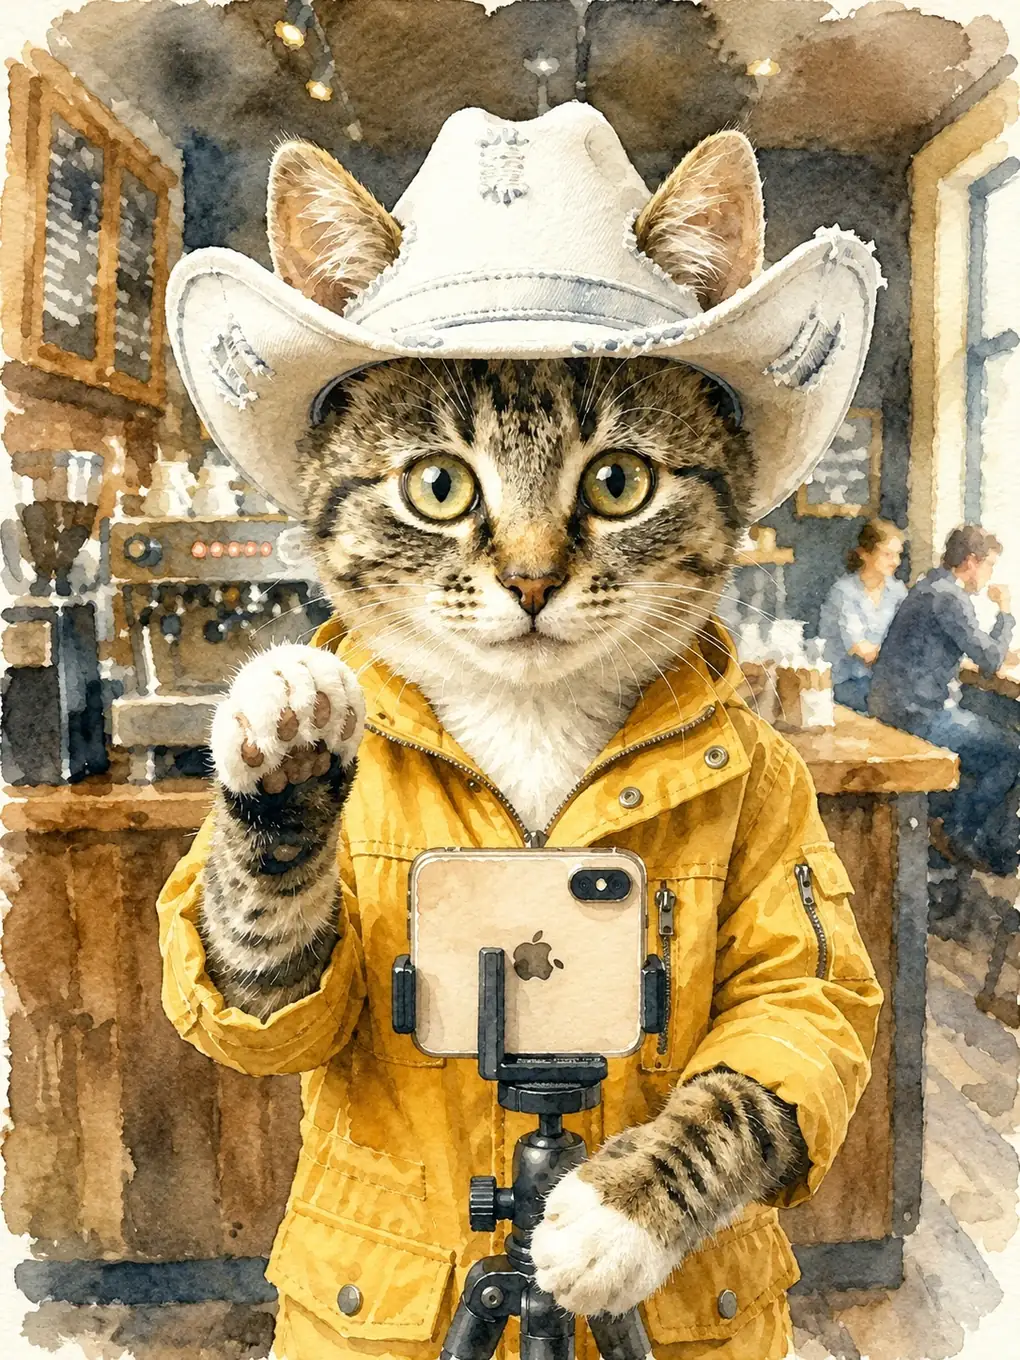 |
This direction suits travel photos, flowers, pets, and scenes with softer lighting.
Anime
Convert this portrait into a polished anime illustration with clean linework, natural facial proportions, detailed hair, soft cel shading, and balanced colors. Keep the expression, outfit, and pose close to the uploaded image.
Before | After |
|---|---|
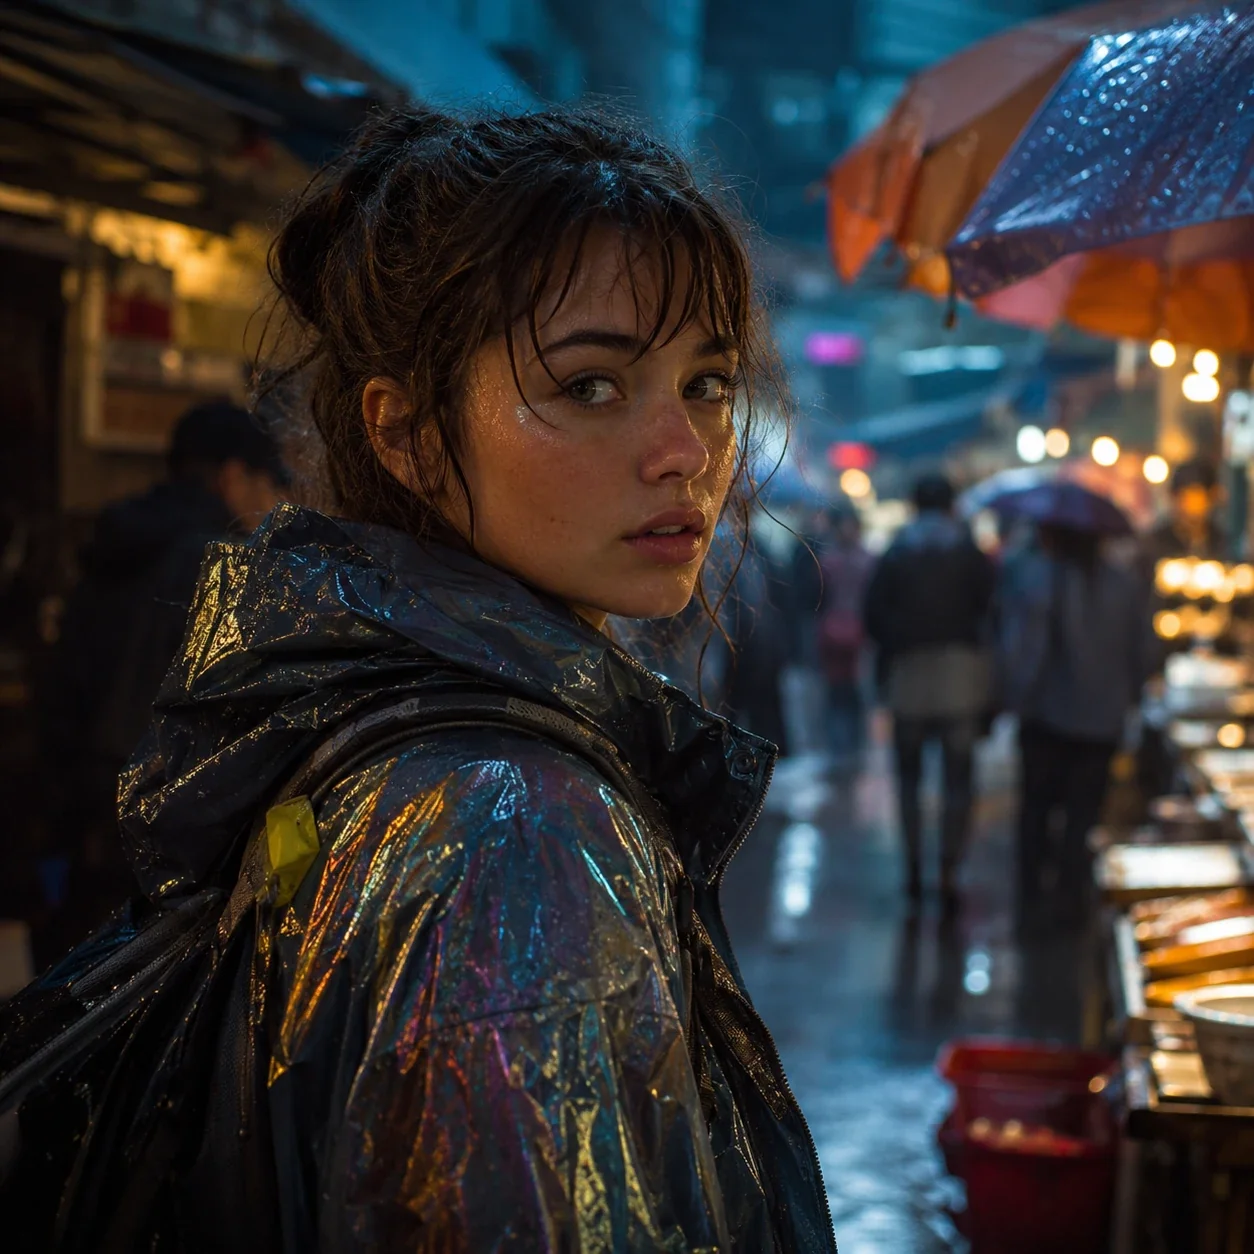 | 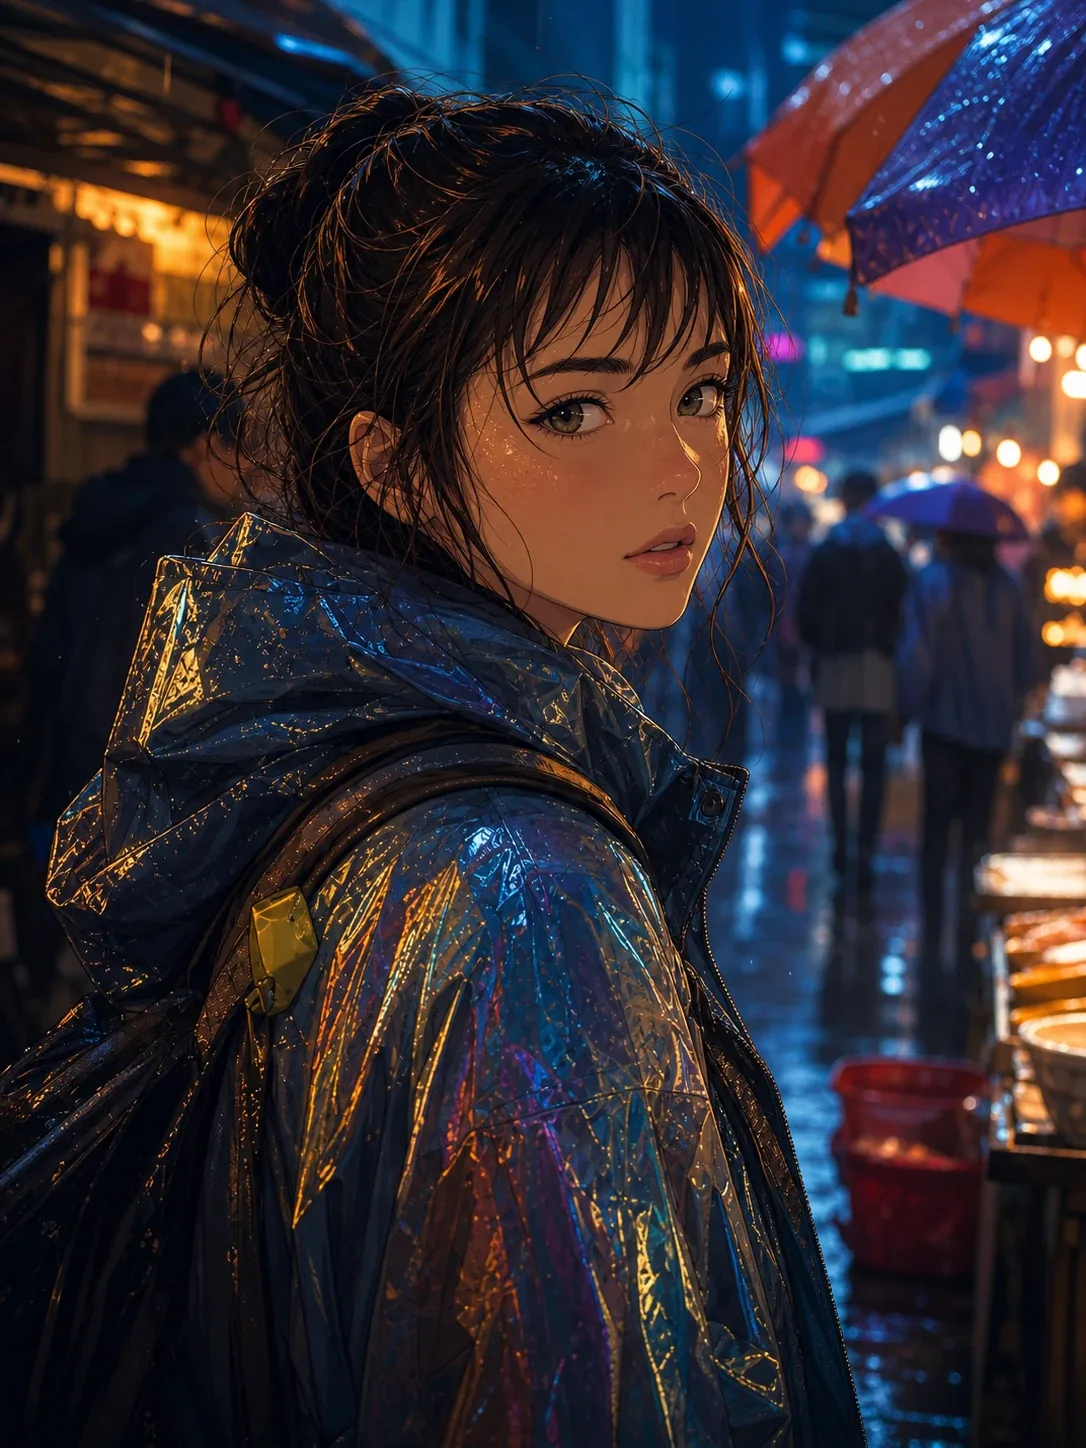 |
For a more cinematic finish, extend the prompt with:
Add atmospheric depth and directional lighting to the background.
Pencil Drawing
Redraw this image as a detailed graphite pencil illustration with fine outlines, controlled shading, light cross-hatching, and visible paper texture. Retain the key proportions and facial details.
Before | After |
|---|---|
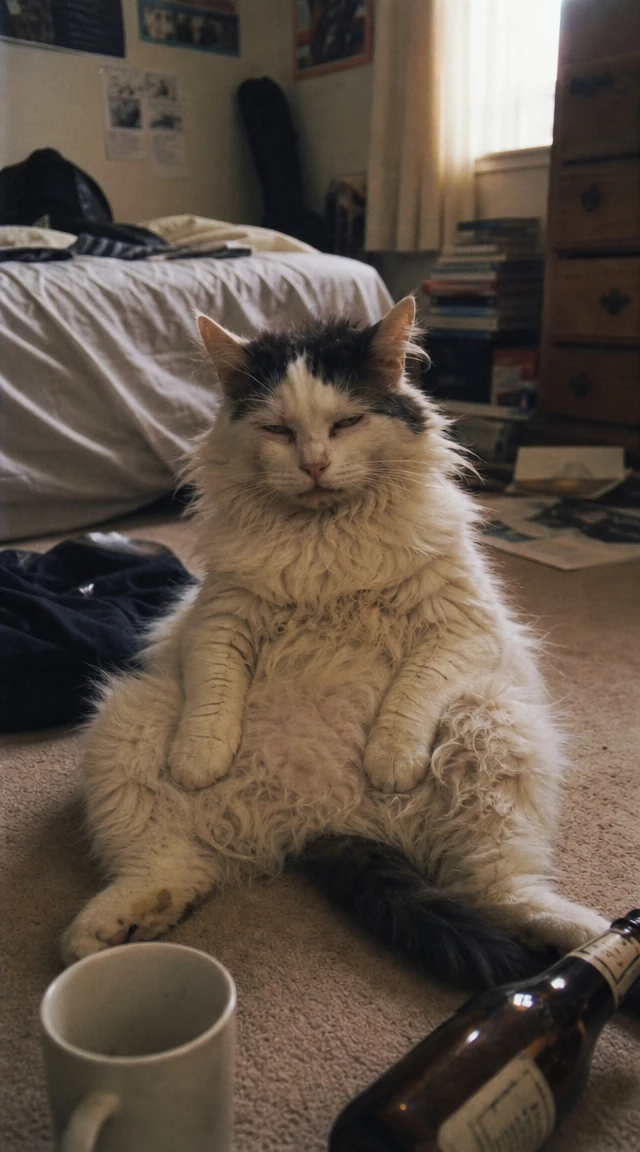 | 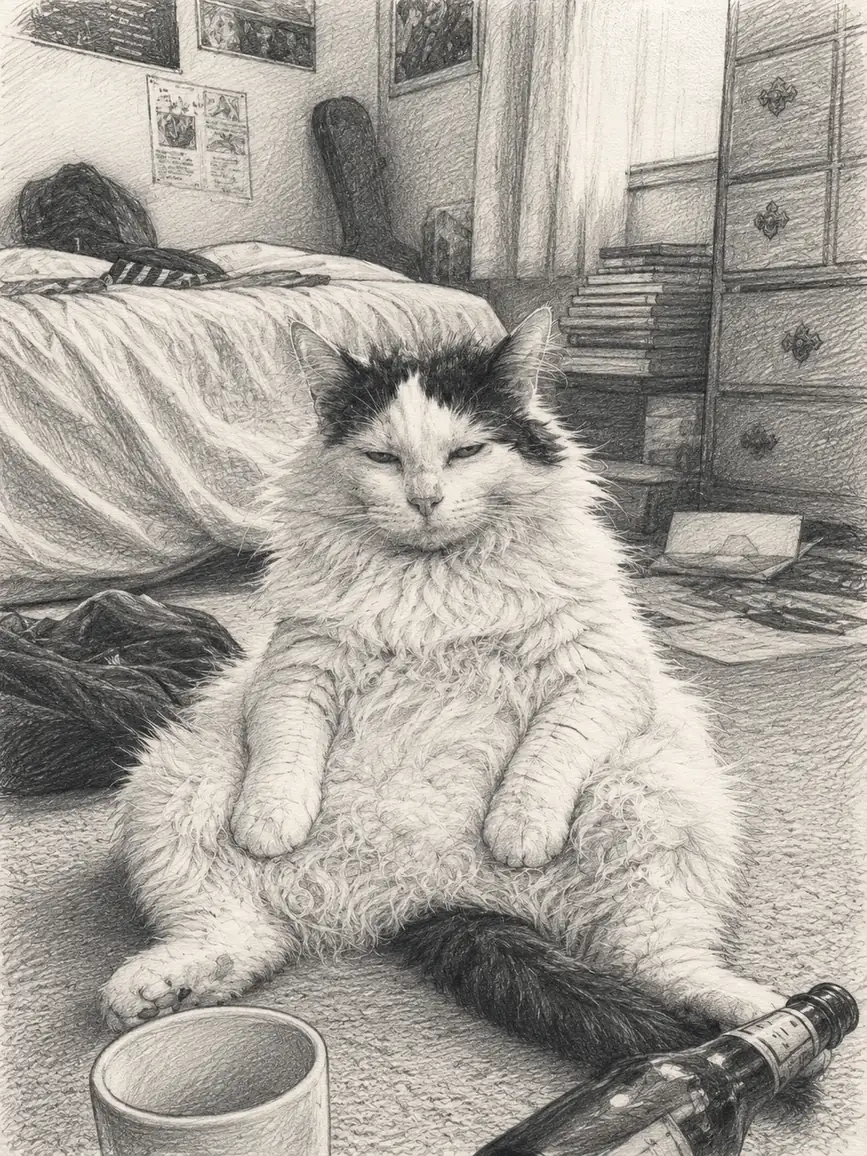 |
This works well for portraits, architecture, pets, and simple product concepts.
Vintage Poster
Turn this travel photo into a vintage screen-printed poster with simplified shapes, broad shadows, a limited retro palette, and subtle paper texture. Keep the landmark and viewing angle recognizable.
Before | After |
|---|---|
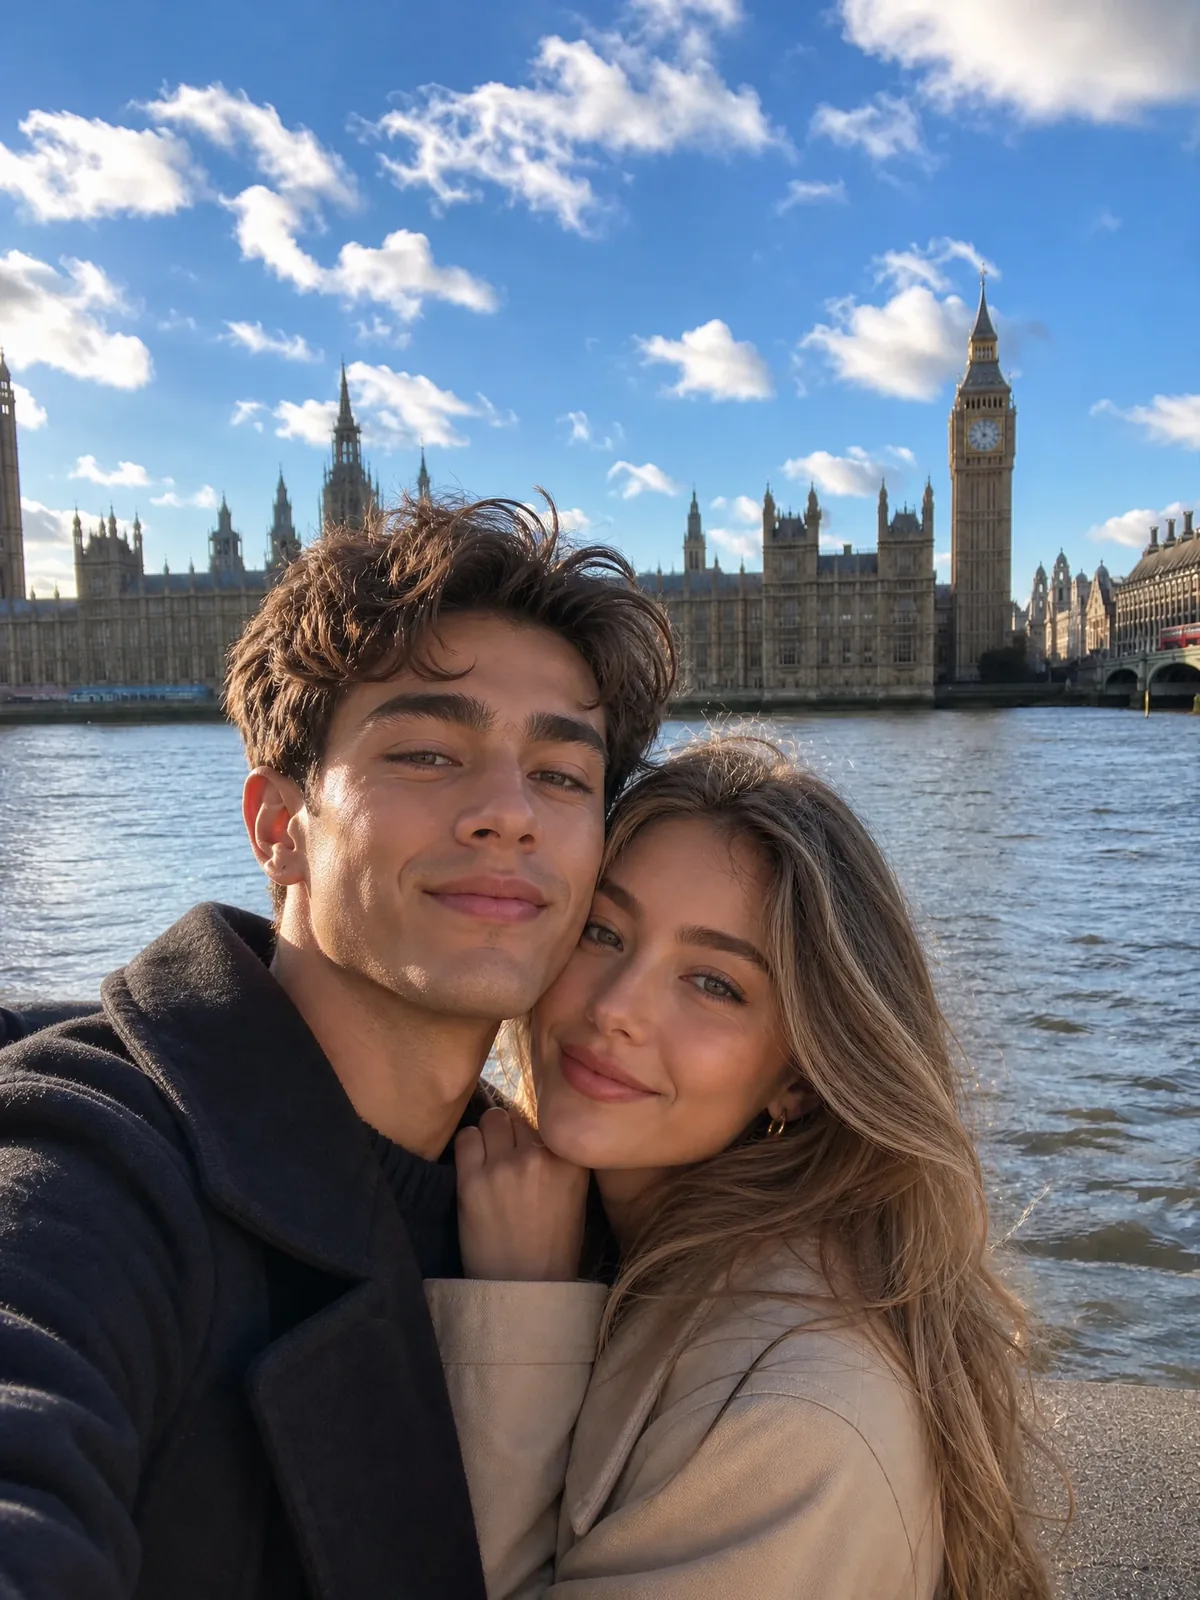 | 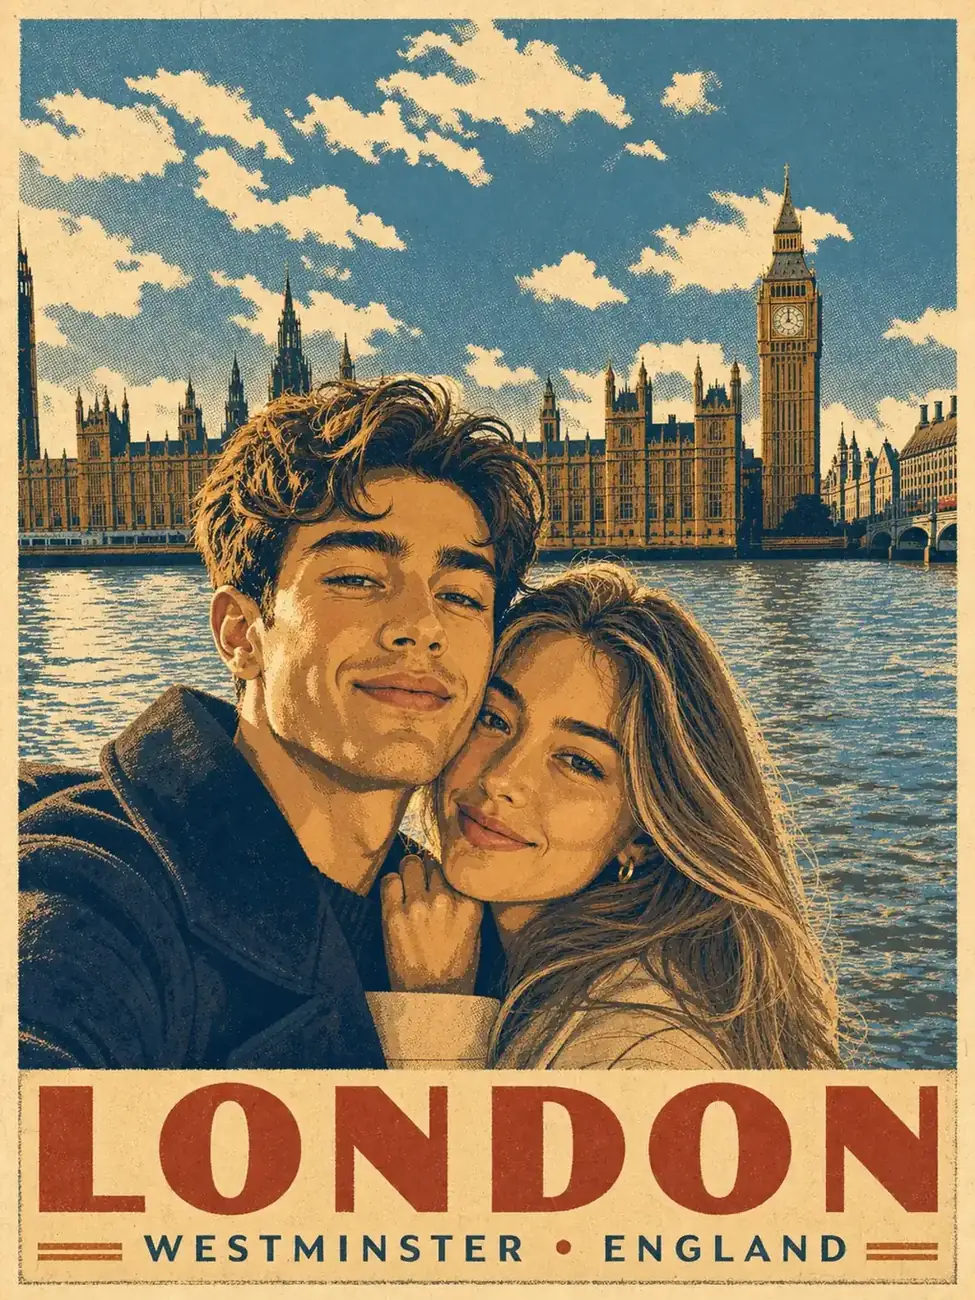 |
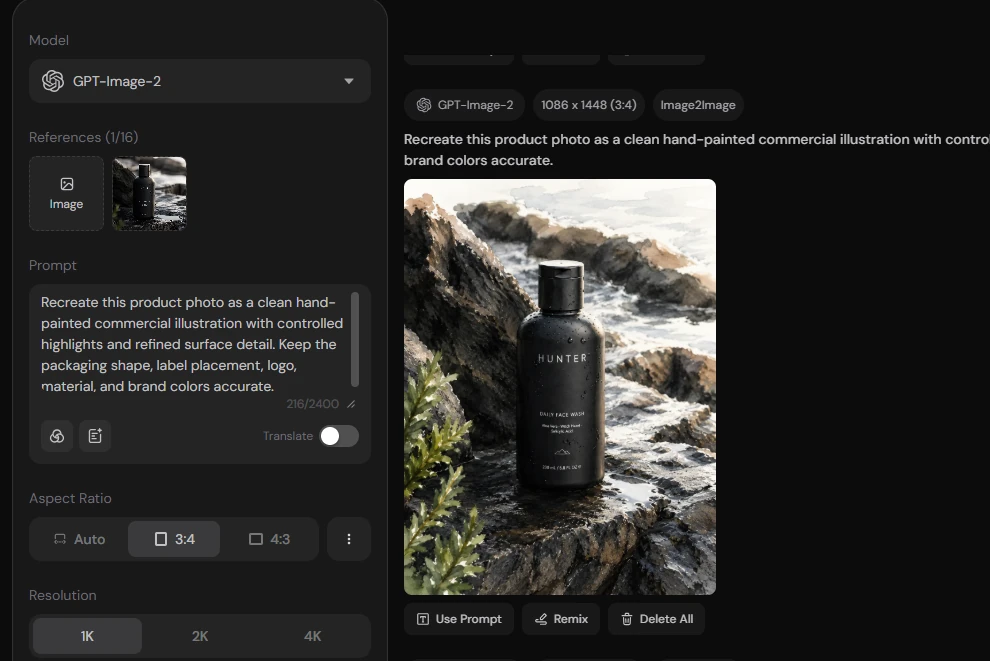
Product Illustration
Recreate this product photo as a clean hand-painted commercial illustration with controlled highlights and refined surface detail. Keep the packaging shape, label placement, logo, material, and brand colors accurate.
Before | After |
|---|---|
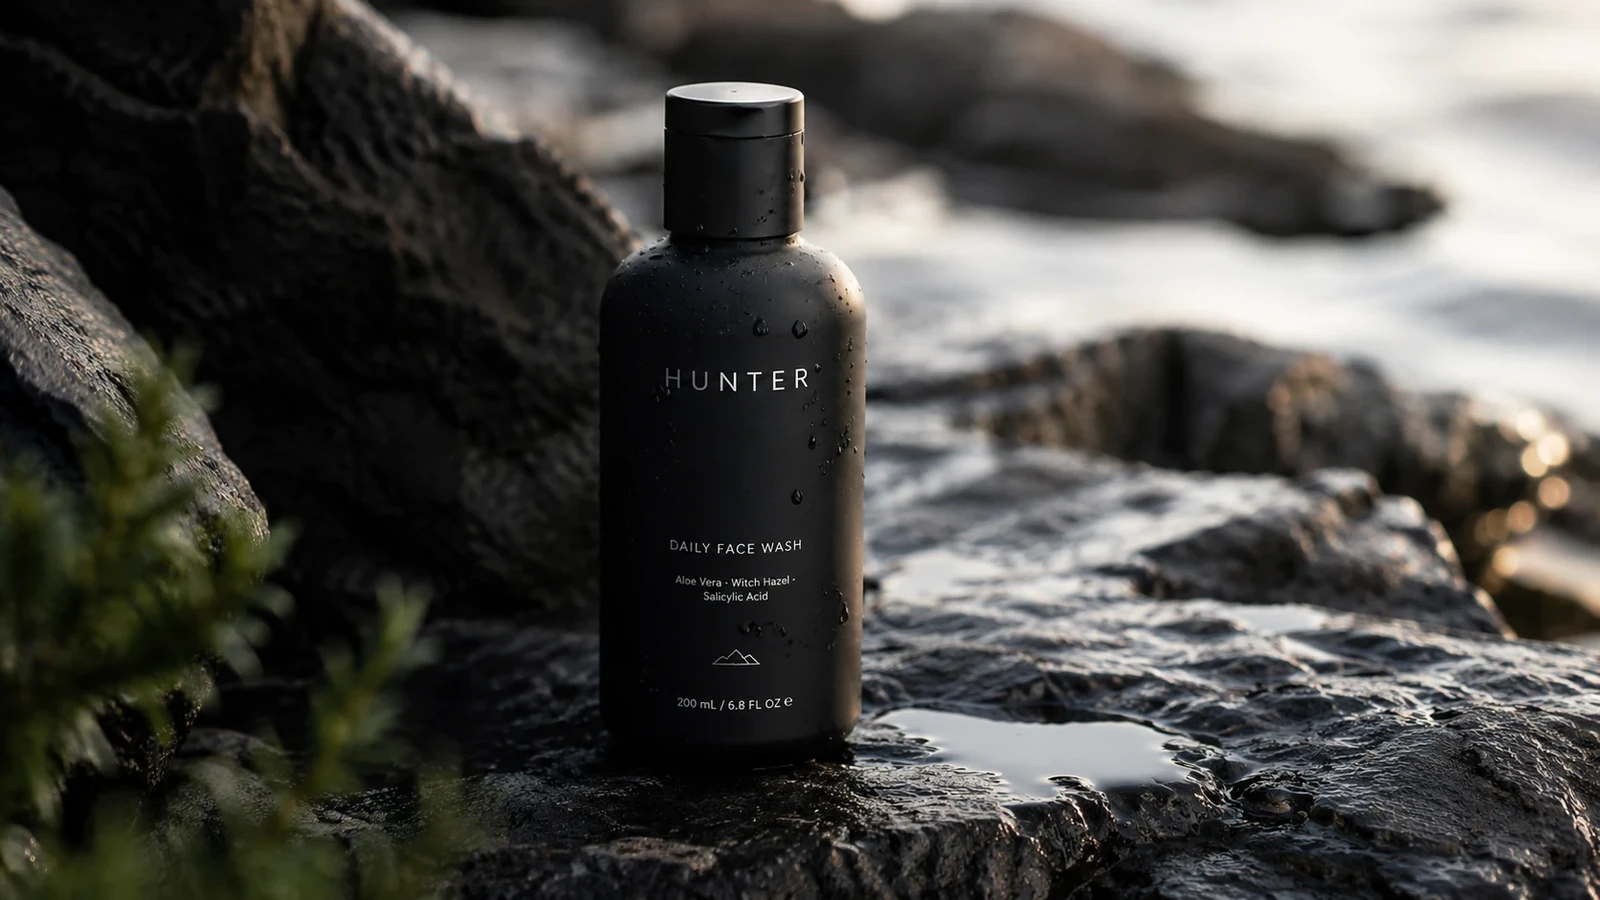 | 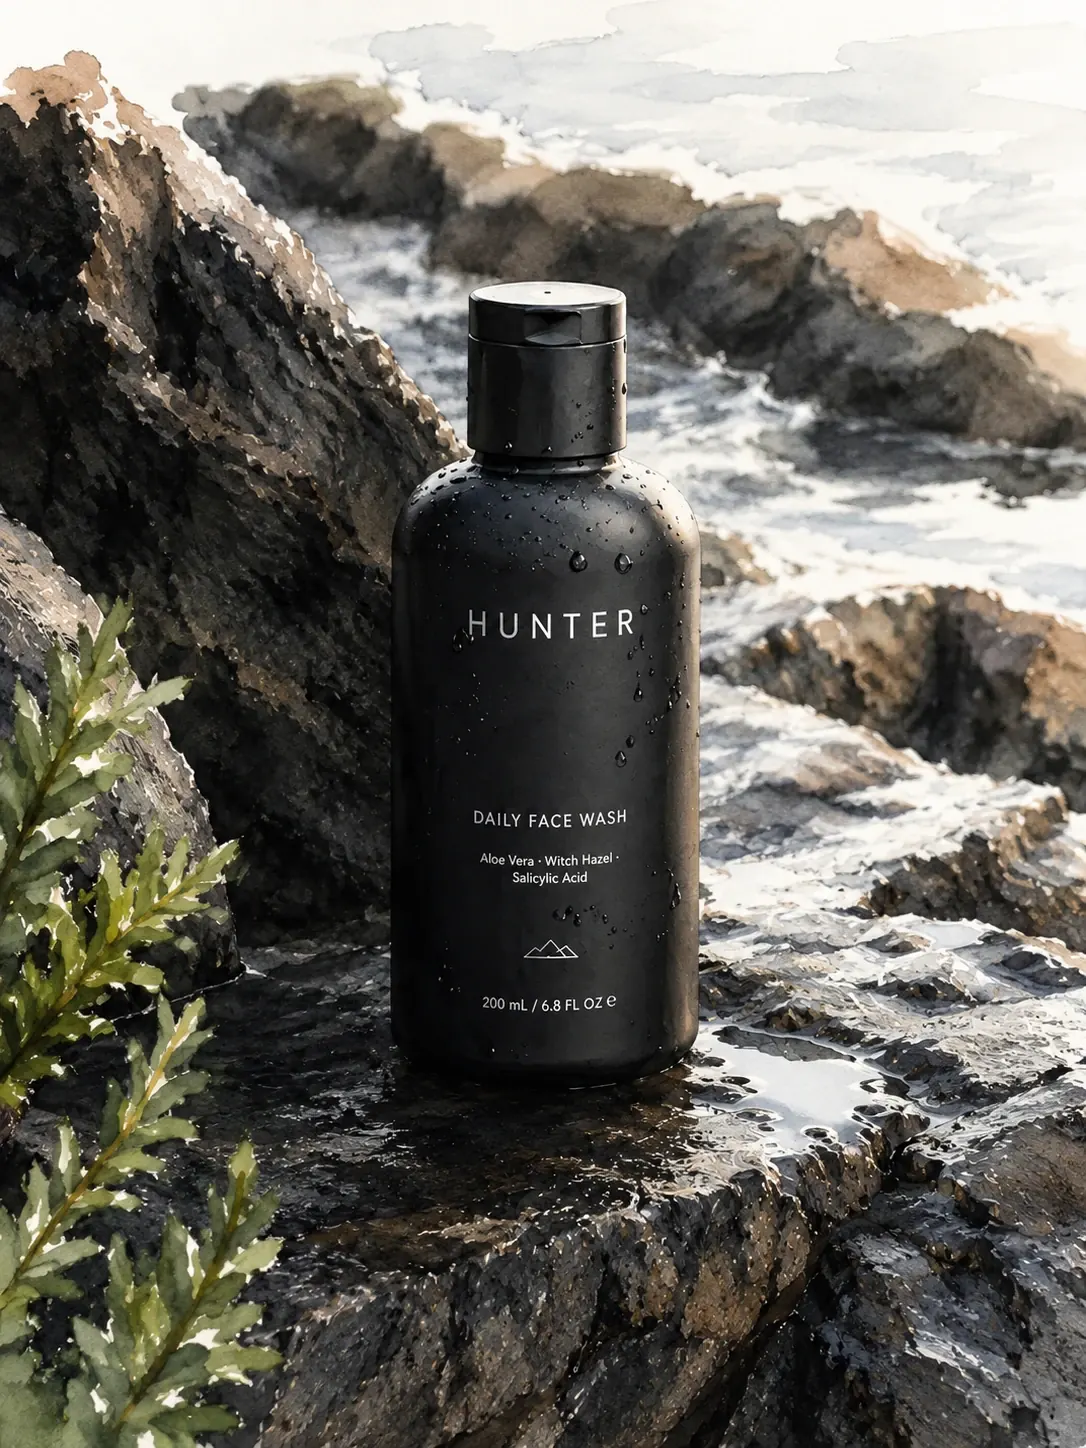 |
How to Get Better Style Transfer Results
Start With an Image That Already Has a Useful Composition
Style transfer will not automatically fix weak framing or an unclear subject. Choose a source photo that is already close to the layout you want.
A busy background is not always a problem, though it gives the model more elements to reinterpret. Simpler images tend to be easier when facial identity or product accuracy matters.
Use Concrete Visual Language
Words such as "beautiful," "creative," and "artistic" give little practical direction. Medium-specific language is more useful:
Thick impasto brushwork
Soft pigment bleeding
Fine graphite cross-hatching
Flat screen-printed shapes
Clean cel shading
Rough paper grain
Warm directional light
Choose the details that suit the target style rather than stacking all of them into one prompt.
Name the Details That Matter
The model cannot know which elements are essential to your project.
For a portrait, mention the face or outfit when they must stay recognizable. In product work, identify the label, logo, packaging shape, or brand colors. A travel image may depend on a specific landmark or viewpoint.
Keep this part selective. Long lists of preservation instructions can make the prompt harder to follow.
Refine One Visible Problem at a Time
If the generated image has one weak area, edit that area first.
Changing the model, prompt, ratio, and style direction at the same time makes it difficult to know which adjustment helped. Small revisions also reduce the risk of losing the parts that already work.
Common Problems and Practical Fixes
Problem | Practical Adjustment |
The new style is barely visible | Add medium-specific texture, brushwork, and surface detail |
The face no longer resembles the source | Request closer facial features and reduce unrelated visual changes |
The output looks like a color filter | Describe how the image should be redrawn, including linework or paint texture |
The composition has shifted | Ask to retain the framing, viewing angle, and subject position |
The background remains photographic | Extend the same style instruction to the full scene |
Product packaging looks inaccurate | Name the shape, label, logo, material, and color that need correction |
The image feels overworked | Simplify the prompt and reduce the number of style instructions |
The result lacks depth | Add a clear light direction, shadows, and atmospheric separation |
Final Thoughts
Changing a photo's style is largely a matter of giving the model a clear visual direction. Choose the medium, describe the texture and lighting, and point out any source details that the final image still needs.
PicLumen keeps the workflow in one place: select a model, upload the photo, write the prompt, set the image size, and generate. The result can then be downloaded, shared, or refined through Edit without restarting the project.
Frequently Asked Questions
What is AI image style transfer?
AI image style transfer recreates an uploaded image in another visual medium, such as watercolor, anime, oil painting, or pencil drawing. The source photo guides the subject and composition, while the prompt controls the new appearance.
How do I use AI image style transfer on PicLumen?
Open PicLumen's image generation workspace and select a model. Upload your source image, enter a style prompt, and choose the resolution and aspect ratio. Click Generate, then download, share, or edit the result.
How can I change an image to a specific art style?
Describe the medium and the features that make it recognizable. For watercolor, that may include translucent washes and paper grain. An oil-painting prompt may mention visible brushstrokes, layered color, and canvas texture.
Add any source details that need to remain accurate.
How do I make a photo look like a Van Gogh painting with AI?
Use a prompt built around thick oil texture, curved brushstrokes, deep blue shadows, golden highlights, and expressive skies. For a portrait or location that needs to remain recognizable, identify those details in the same prompt.
Can style transfer keep the same face?
A clear source portrait and a focused instruction help. Ask the model to keep the facial features, hairstyle, expression, and general proportions close to the uploaded photo.
Can I edit the result after generation?
Yes. PicLumen's Edit option can be used to refine a generated image when the overall result works but a specific area still needs correction.
Can I download or share the result directly?
Yes. Generated results can be downloaded in their original quality or shared directly.