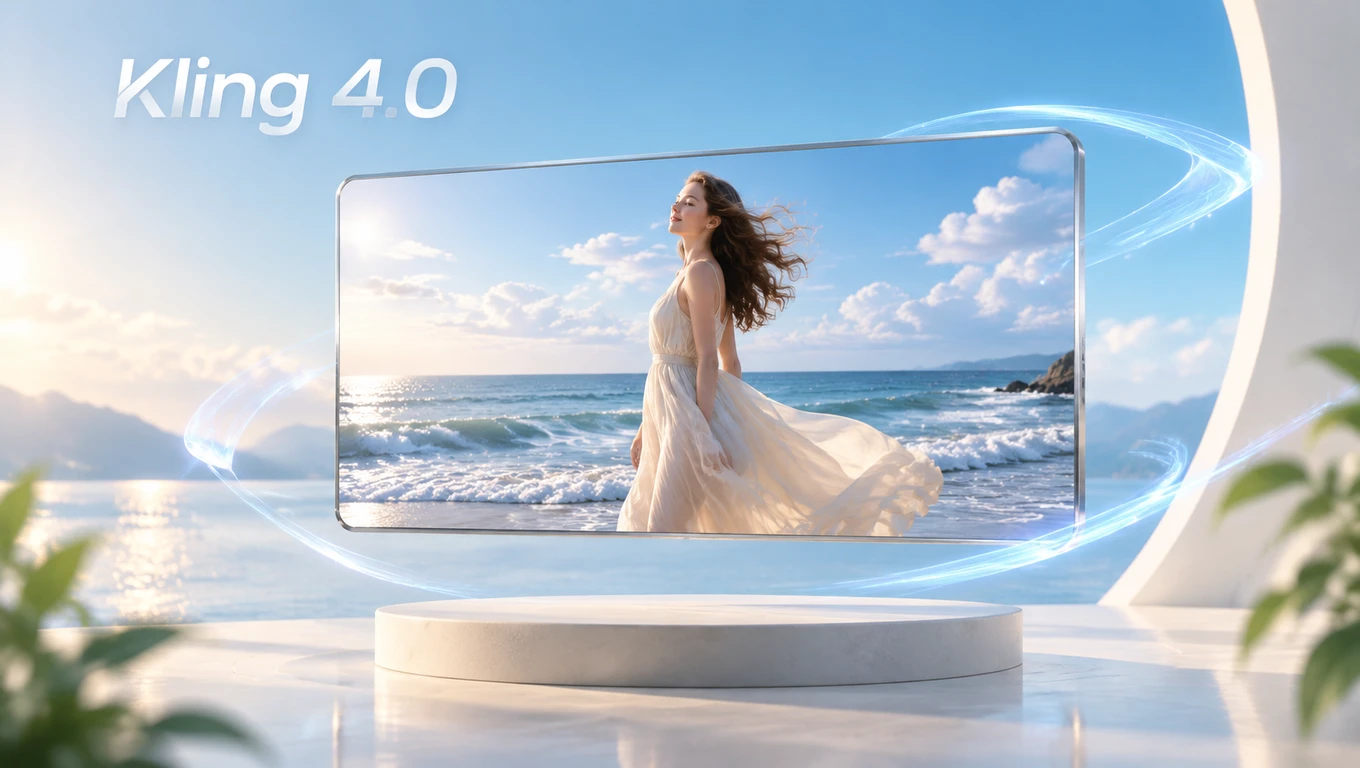
Kling 4.0 gives you more ways to create AI videos from text prompts and visual references. You can generate a scene from scratch, animate an existing image, or use reference materials to shape the result.
This guide walks you through Kling 4.0 on PicLumen, starting with the Image-to-Video workflow. It also covers other creation methods and practical tips for better results.
What You Need to Know Before Using Kling 4.0
Overview of Kling 4.0
Kling 4.0 supports longer video clips and more precise scene control. You can generate videos up to 30 seconds long. It supports up to 10 keyframes (1 start frame, 1 end frame, and 8 middle frames) and 15 multimodal reference assets. It also improves audio generation, lip sync, and camera movement, giving creators more control over the final video.
Available Creation Methods
Kling 4.0 supports several video creation workflows, including Text-to-Video, Image-to-Video, Keyframes, and Omni Reference.
Video Settings and Generation Credits
Before generating a video, check its duration, aspect ratio, resolution, and credit cost. Available options may vary depending on the selected workflow.
Choose the Right Kling 4.0 Workflow for Your Project
Your Starting Point | Recommended Method | What You Can Create |
Have a video idea but no images | Text-to-Video | A video generated from your text prompt |
Have an image you want to animate | Image-to-Video | A video with movement based on your image |
Want to plan key moments in a generated video | Keyframes | A video with planned visual changes |
Have images, videos, or other references | Omni Reference | A video guided by multiple reference materials |
How to Turn an Image into a Video with Kling 4.0 on PicLumen
To create a video with Kling 4.0, start by uploading a reference image and describing the movement you want to see. You can then adjust the video settings, generate your clip, and refine the result. Follow these steps to get started.
Step 1. Upload Your Reference Image
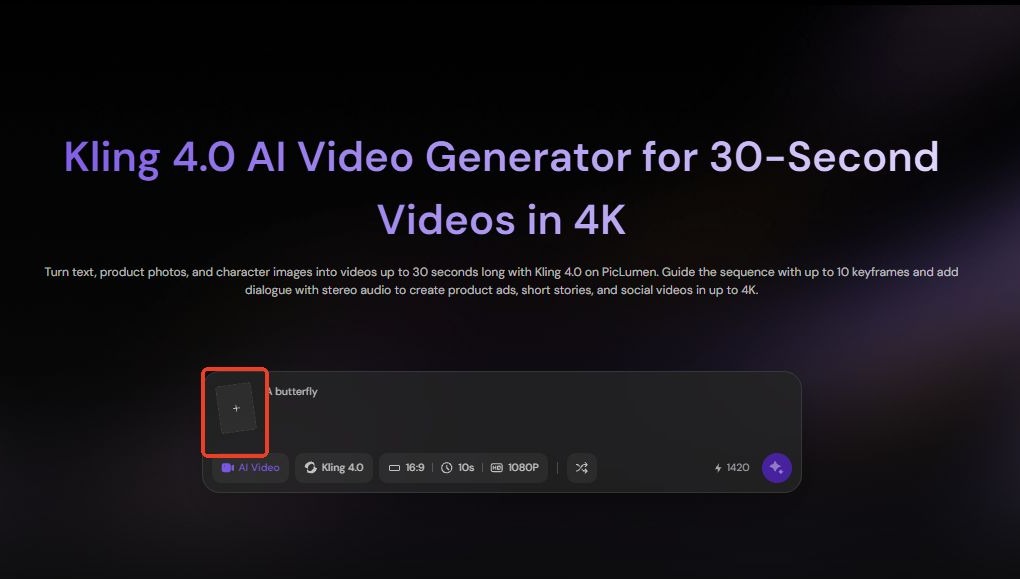
Upload the image you want to animate. Choose a reference image that shows the subject and visual details you want to keep in the generated video.
Step 2. Write a Prompt to Describe the Motion
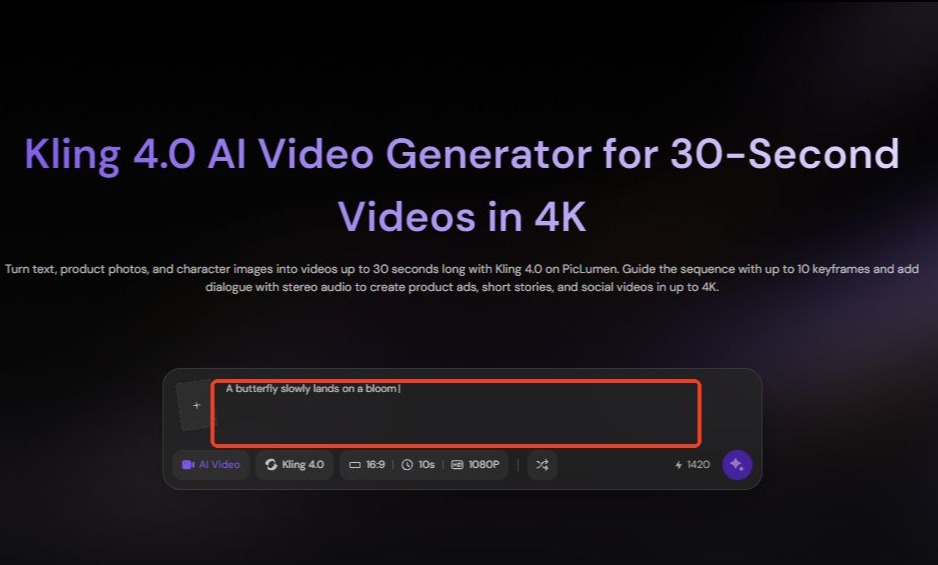
Enter a prompt describing the movement you want to create. Include the subject's actions, any changes in the scene, and the camera movement. Keep the instructions focused on the main action. If you have added elements (like a character) to the workspace, type @ in the prompt box to select and link them to your prompt.
Step 3. Choose Your Video Settings
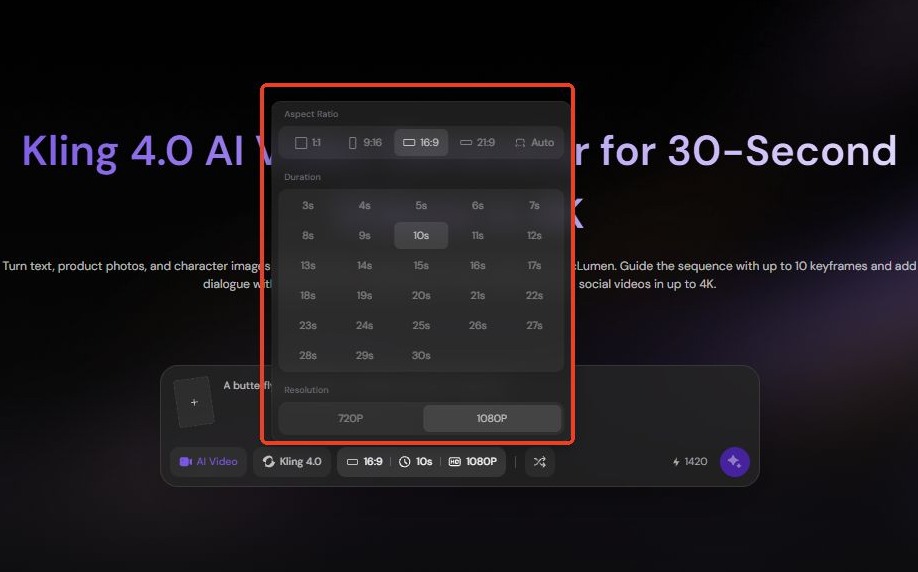
Choose your preferred video duration, aspect ratio, and resolution from the available options. The workspace defaults to 16:9 and 1080p. Match the aspect ratio to your intended platform, such as 16:9 for landscape videos or 9:16 for vertical content.
Step 4. Generate and Preview Your Video
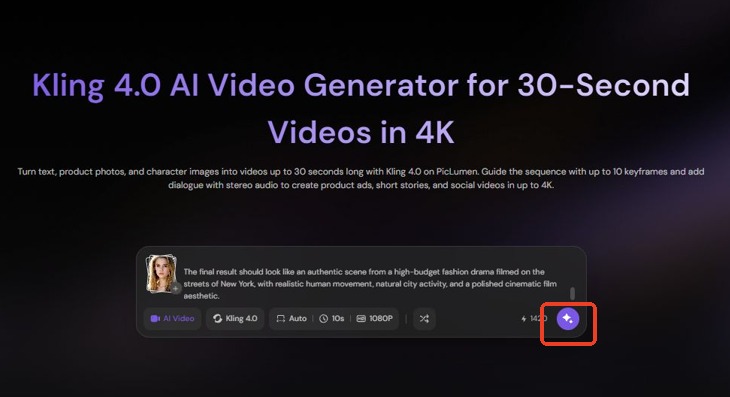
Review your reference image, prompt, and settings, then click Generate. Once the video is ready, preview it to check whether the subject's movements, appearance, and camera motion match your prompt.
Step 5. Refine and Download Your Video
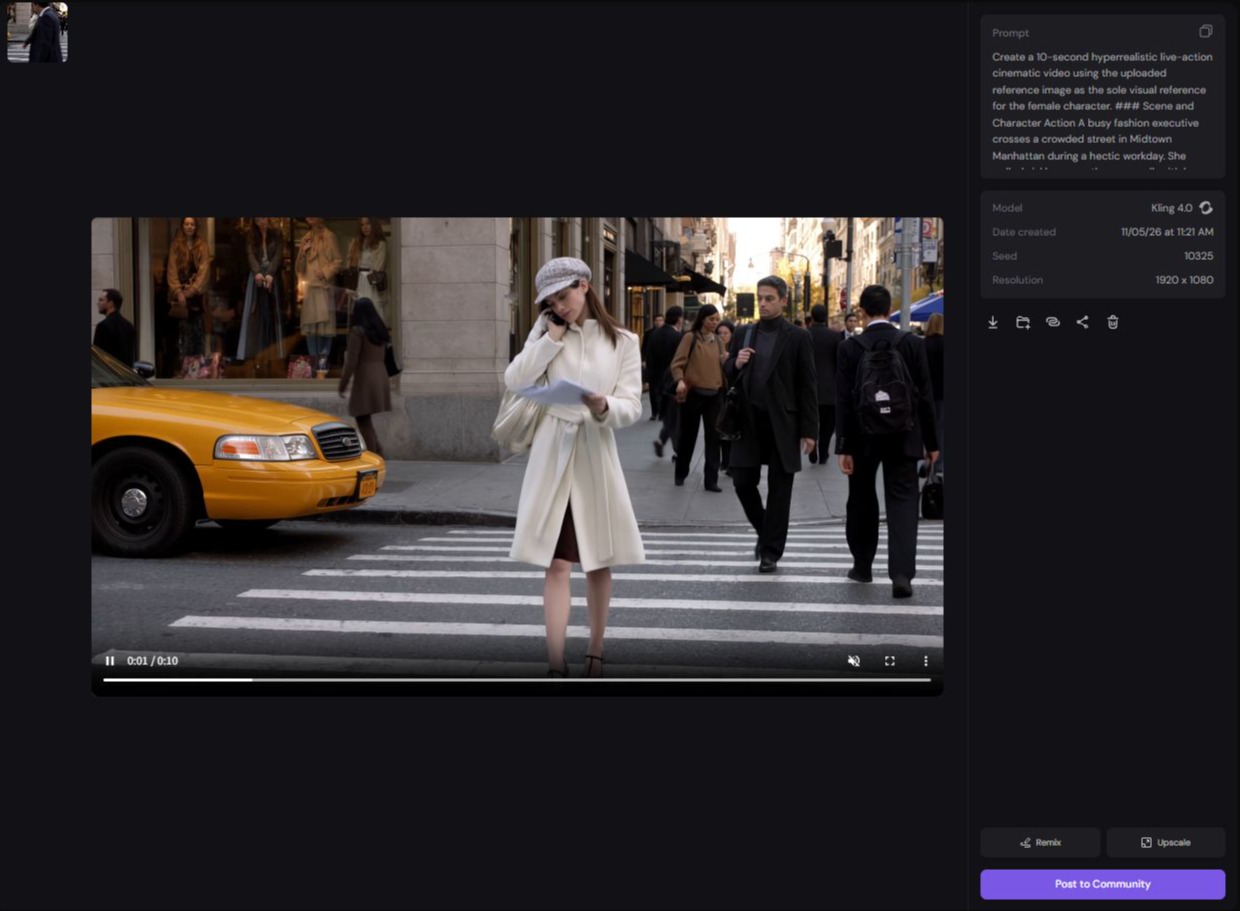
If the result doesn't look right, adjust your prompt. For incorrect movement, make the subject's actions more specific. For unnatural shots, simplify the camera directions. Generate another version and review the result. Download your video when it's ready.
Final Result
The video below shows the final result generated with Kling 4.0 Image-to-Video on PicLumen.
Other Ways to Create Videos with Kling 4.0
You can also use Text-to-Video, Keyframes, or Omni Reference to create videos with Kling 4.0. Each method works with different types of input.
Generate Videos from Text Prompts
If you don't have a reference image, start with a text prompt. Describe the subject, setting, main action, and camera movement to guide the generated video.
For example:
A young woman in a white dress walks through a wildflower field at golden hour. A gentle breeze moves her dress. She turns toward the camera and smiles. The camera follows from behind and slowly moves to a medium shot.
Control Video Scenes with Keyframes
Keyframes are useful when your video needs to follow a specific sequence. Upload images for important moments, such as the opening scene, a change in the setting, or the final shot. Then use your prompt to describe the actions and transitions between them.
Guide Video Generation with Omni Reference
Use Omni Reference when you want to guide a video with multiple reference materials. You can use images to define a character's appearance, a product's details, or the visual style. Reference videos can guide movement, camera angles, and scene pacing. Voice references can also help guide the audio.
Add the reference materials that are relevant to your project, then describe how you want Kling 4.0 to use them in your prompt. You can combine up to 10 images, 5 videos, and 7 elements, but the total number of reference assets cannot exceed 15. For example, you can use a character image to guide the subject's appearance and a reference video to guide the movement.
How to Improve Your Kling 4.0 Image-to-Video Results
Your reference image and motion prompt both affect the final result. These tips can help you get more natural movement and keep important visual details consistent.
Choose Images with Clear Subjects
Choose an image where the main subject is easy to recognize. Make sure important details, such as facial features, clothing, or product shapes, are clearly visible. Avoid blurry images or compositions where the main subject is difficult to distinguish from the background.
Describe One Main Action at a Time
Focus on one main action in your prompt. For example, describe a person walking forward instead of asking them to walk, turn around, wave, and sit down in the same shot. If you need several actions, describe them as a clear sequence.
Keep Camera Directions Simple
Use simple camera instructions, such as slowly zooming in, following the subject, or panning from left to right. Avoid combining several camera movements in one prompt.
Match Your Prompt to the Uploaded Image
Write your prompt with the reference image in mind. If you want to keep the original scene, describe movements that fit the existing setting. If you want to add objects or change the background, explain those changes clearly.
Adjust Your Prompt Based on the Generated Result
Review the generated video and identify the specific issue. If the subject's movement looks unnatural, make the action more precise. If the camera motion is incorrect, adjust the camera instructions without changing the rest of the prompt. Test one change at a time to see how it affects the result.
FAQs
Can I use Kling 4.0 on PicLumen for free?
Whether you can use Kling 4.0 for free depends on its availability and credit requirements on PicLumen. Check the model's generation cost in the workspace before creating a video.
What types of images work best for Kling 4.0 Image-to-Video?
Choose high-quality images with clear subjects, good lighting, and visible details. Avoid blurry images or compositions where the main subject is difficult to recognize. For the best framing, choose an image with an aspect ratio that matches your intended video format.
How long can Kling 4.0 videos be?
Kling 4.0 supports video generation from 3 to 30 seconds in a single generation.
What resolutions and aspect ratios does Kling 4.0 support?
Kling 4.0 offers 720p and 1080p outputs. Its supported aspect ratios include 16:9, 9:16, 1:1, 21:9, and an Auto option. Note that the Auto aspect ratio is only available for reference-to-video workflows.
Can Kling 4.0 generate audio and dialogue?
Yes. Kling 4.0 supports generated stereo audio, including speech and dialogue. It also supports multiple languages and accents, with improved lip sync to help match speech with character movements.
How can I keep characters consistent in generated videos?
Use Omni Reference to lock the character's appearance across the video. For specific key moments, use Keyframes to define how the character looks at those exact points. You can also keep their clothing, hairstyle, and facial features consistent in your prompt.